“], “filter”: { “nextExceptions”: “img, blockquote, div”, “nextContainsExceptions”: “img, blockquote, a.btn, a.o-button”} }”>
Heading out the door? Read this article on the new Outside+ app available now on iOS devices for members!
>”,”name”:”in-content-cta”,”type”:”link”}}”>Download the app.
There’s been a lot of talk in recent years about normalizing the use of props in yoga. Even better, there’s been a lot of actual normalizing of props in yoga, which means more of us can experience the revelatory difference props can make in supporting, aligning, even challenging the body in a pose, including common ones such as Pyramid Pose.
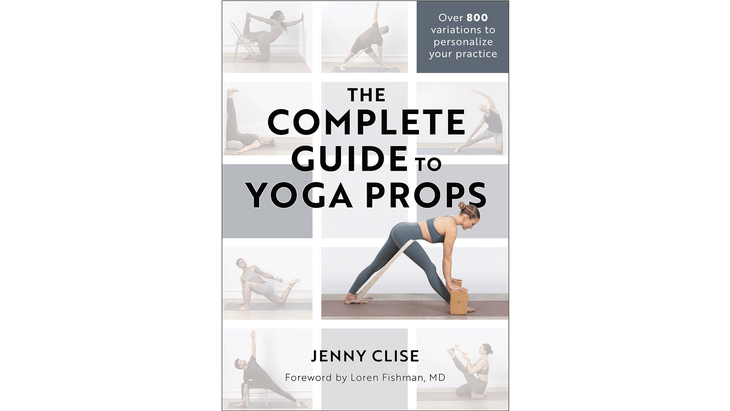
However, a certain measure of prop know-how is required for usage to take place, preferably beyond taking a block beneath your hand. The Complete Guide to Yoga Props fills in that gap. Written by Jenny Clise, yoga therapist and Yoga Journal’s social media manager, the book presents simple as well as innovative ways to enlist all manner of props in all manner of poses, whether arm balances or standing poses, backbends or restorative. Once you experience her suggestions, you may wonder how you made it this long without relying on the wall, a chair, a strap, or blocks so you feel more stable, more aligned, or more intense iteration of the pose.
Following are her suggestions for a pose that many students insist on suffering through without assistance, commonly known as Pyramid Pose or Parsvottanasana. —YJ Editors
How to Use Props in Pyramid Pose or Intense Side Stretch
पार्श्वोत्तानासन
Intense Side Stretch Pose, most often referred to as Pyramid Pose, is a forward-bending yoga posture that offers a targeted stretch to the spine, shoulders, hips, and hamstrings. It enhances flexibility and actively strengthens the legs. Let’s delve into variations of Pyramid Pose using props.
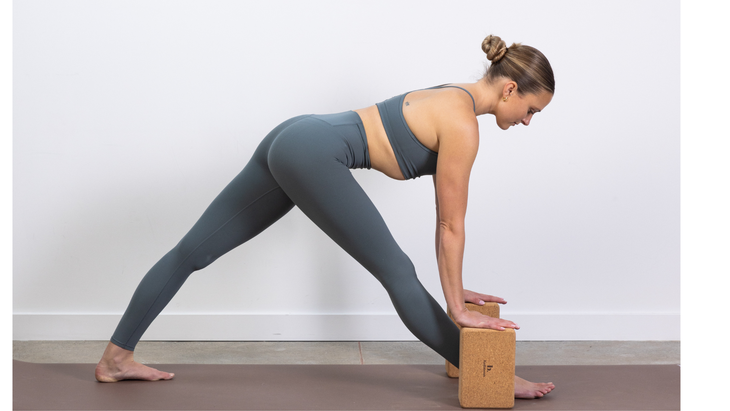
1. Use blocks or a chair under your hands to raise the height of the floor
Props are a useful tool to bridge the gap between the hands and the mat or floor. They will also assist in finding balance if the floor is out of reach. Try using blocks under your hands to start. If you are working toward a flat back, you can use the blocks to aid in spinal extension as well.
You can begin with the blocks right under your shoulders, then inhale into a halfway lift, extending through the spine. From here, either fold back into the stretch or walk the blocks forward. Having the blocks farther forward will extend the arms in the direction of the spine, but it is more of a balance challenge! If you are relaxing your spine into the fold, try switching your gaze to the wall behind you to relax the head and neck completely; imagine the brain feeling heavy in the skull. Let the blocks offer support so you can relax deeper into the stretch.

A chair works like blocks under your hands with the key difference being placing your hands on the seat or back of a chair. This adds more height than blocks and can be a great step on your way to bringing the hands all the way to the blocks.
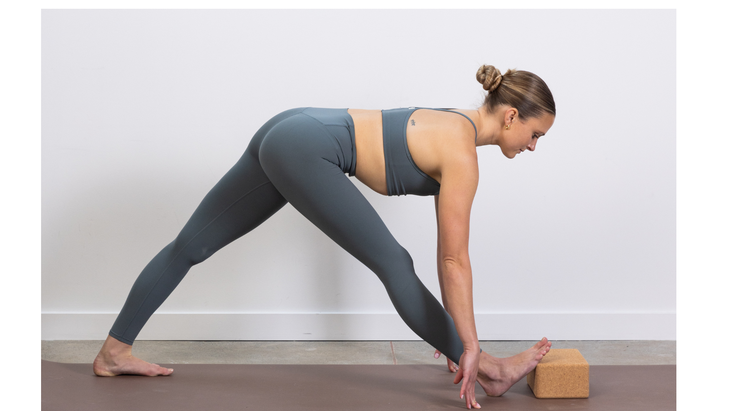
2. Place a block under your flexed front foot to deepen the stretch
Using a block in this pose can help to deepen the stretch down the back side of the front leg. Enter your pyramid pose. From here flex through the front foot, reaching the toes back toward the shin and contracting the shin toward the front knee. Turn a block to its lowest height and slide it under the ball of the foot. Inhale, lift halfway, and press through the ball of the foot, contracting the calf. Exhale, fold, and flex the toes toward the shin, releasing the calf muscles.
Wedge a block under your front leg calf to counteract hyperextension of the knee.
This variation is a great tool if you tend to lock your knees beyond a normal or safe range. A wedged, angled block under your calf creates a small bend in the front knee, helping you to engage the stabilizing muscles surrounding the knee. So rather than sinking into bones and joints through your hyperflexibility, you engage the muscles of the front leg, and it still helps with flexibility! The contraction of the posterior muscles on the front side of the leg helps to stretch the anterior muscles on the back side of the leg.
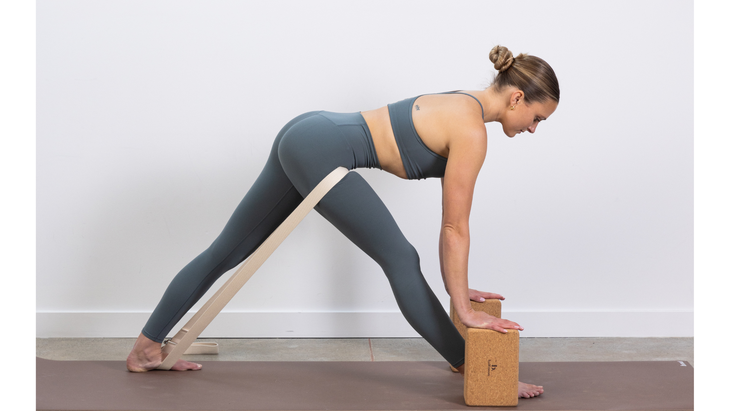
3. Loop a strap around your back foot and front leg hip to engage and align
A looped strap in intense side stretch pose reinforces the action of pressing into the outer edge of your back foot. This action engages the muscles of the back leg, lifting through the arch of your back foot and inner thigh, which also supports the knee. As you press into the strap with your back foot, the front of the loop will gently draw your front hip back, rooting the femur bone into your hip socket. You may need to play with the size of the loop to find the best fit.
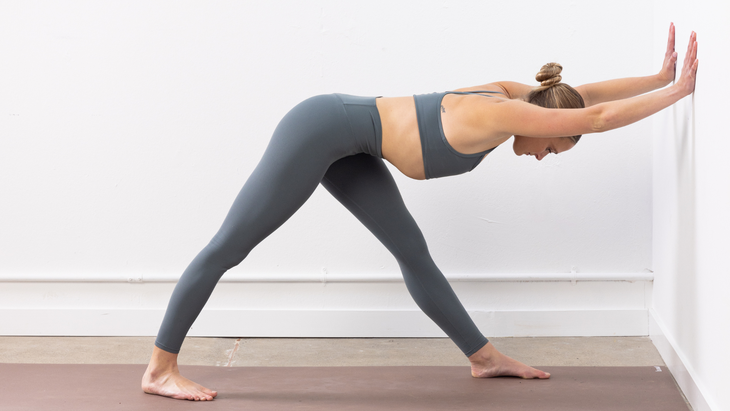
4. Place your hands on a wall to mindfully uphold the integrity of an extended spine
If you are working on a fully extended spine in intense side stretch pose, place your hands on a wall in front of you. Start with your hands higher up on the wall, gently pressing into the wall to assist drawing the front hip back and leveling the shoulders. Over time, work the hands farther down the wall, as long as you can still facilitate axial extension in the spine.
Excerpted from The Complete Guide to Yoga Props by Jenny Clise © 2025. Reprinted with permission of Human Kinetics Publishers, Champaign, IL.


