Published December 22, 2025 05:35AM
In Yoga Journal’s Archives series, we share a curated collection of articles originally published in past issues beginning in 1975. These stories offer a glimpse into how yoga was interpreted, written about, and practiced throughout the years. This article first appeared on YogaJournal.com in 2023. Find more of our Archives here.
It takes less time than you might expect to drastically alter your emotional state. And the following 15-minute yoga for stress relief practice helps you do exactly that. It doesn’t ask you to do anything overly strenuous or complicated. It’s a slow flow designed specifically to minimize effort and emphasize stress relief. Plus it’s short enough so as not to add to your overwhelm but rather help you come back to yourself anytime you need it, even if you’ve never practiced yoga before.
The primary goal of practicing yoga for stress relief is to relax and find ease in both your body and mind. To support that, you’ll utilize easy breathwork exercises to help soothe the nervous system.
15-Minute Yoga for Stress Relief
Instead of the traditional Savasana at the end, you’ll transition into a seated meditation to further ground yourself without being tempted to fall asleep. This allows you to go back to your day with more focus and calm.
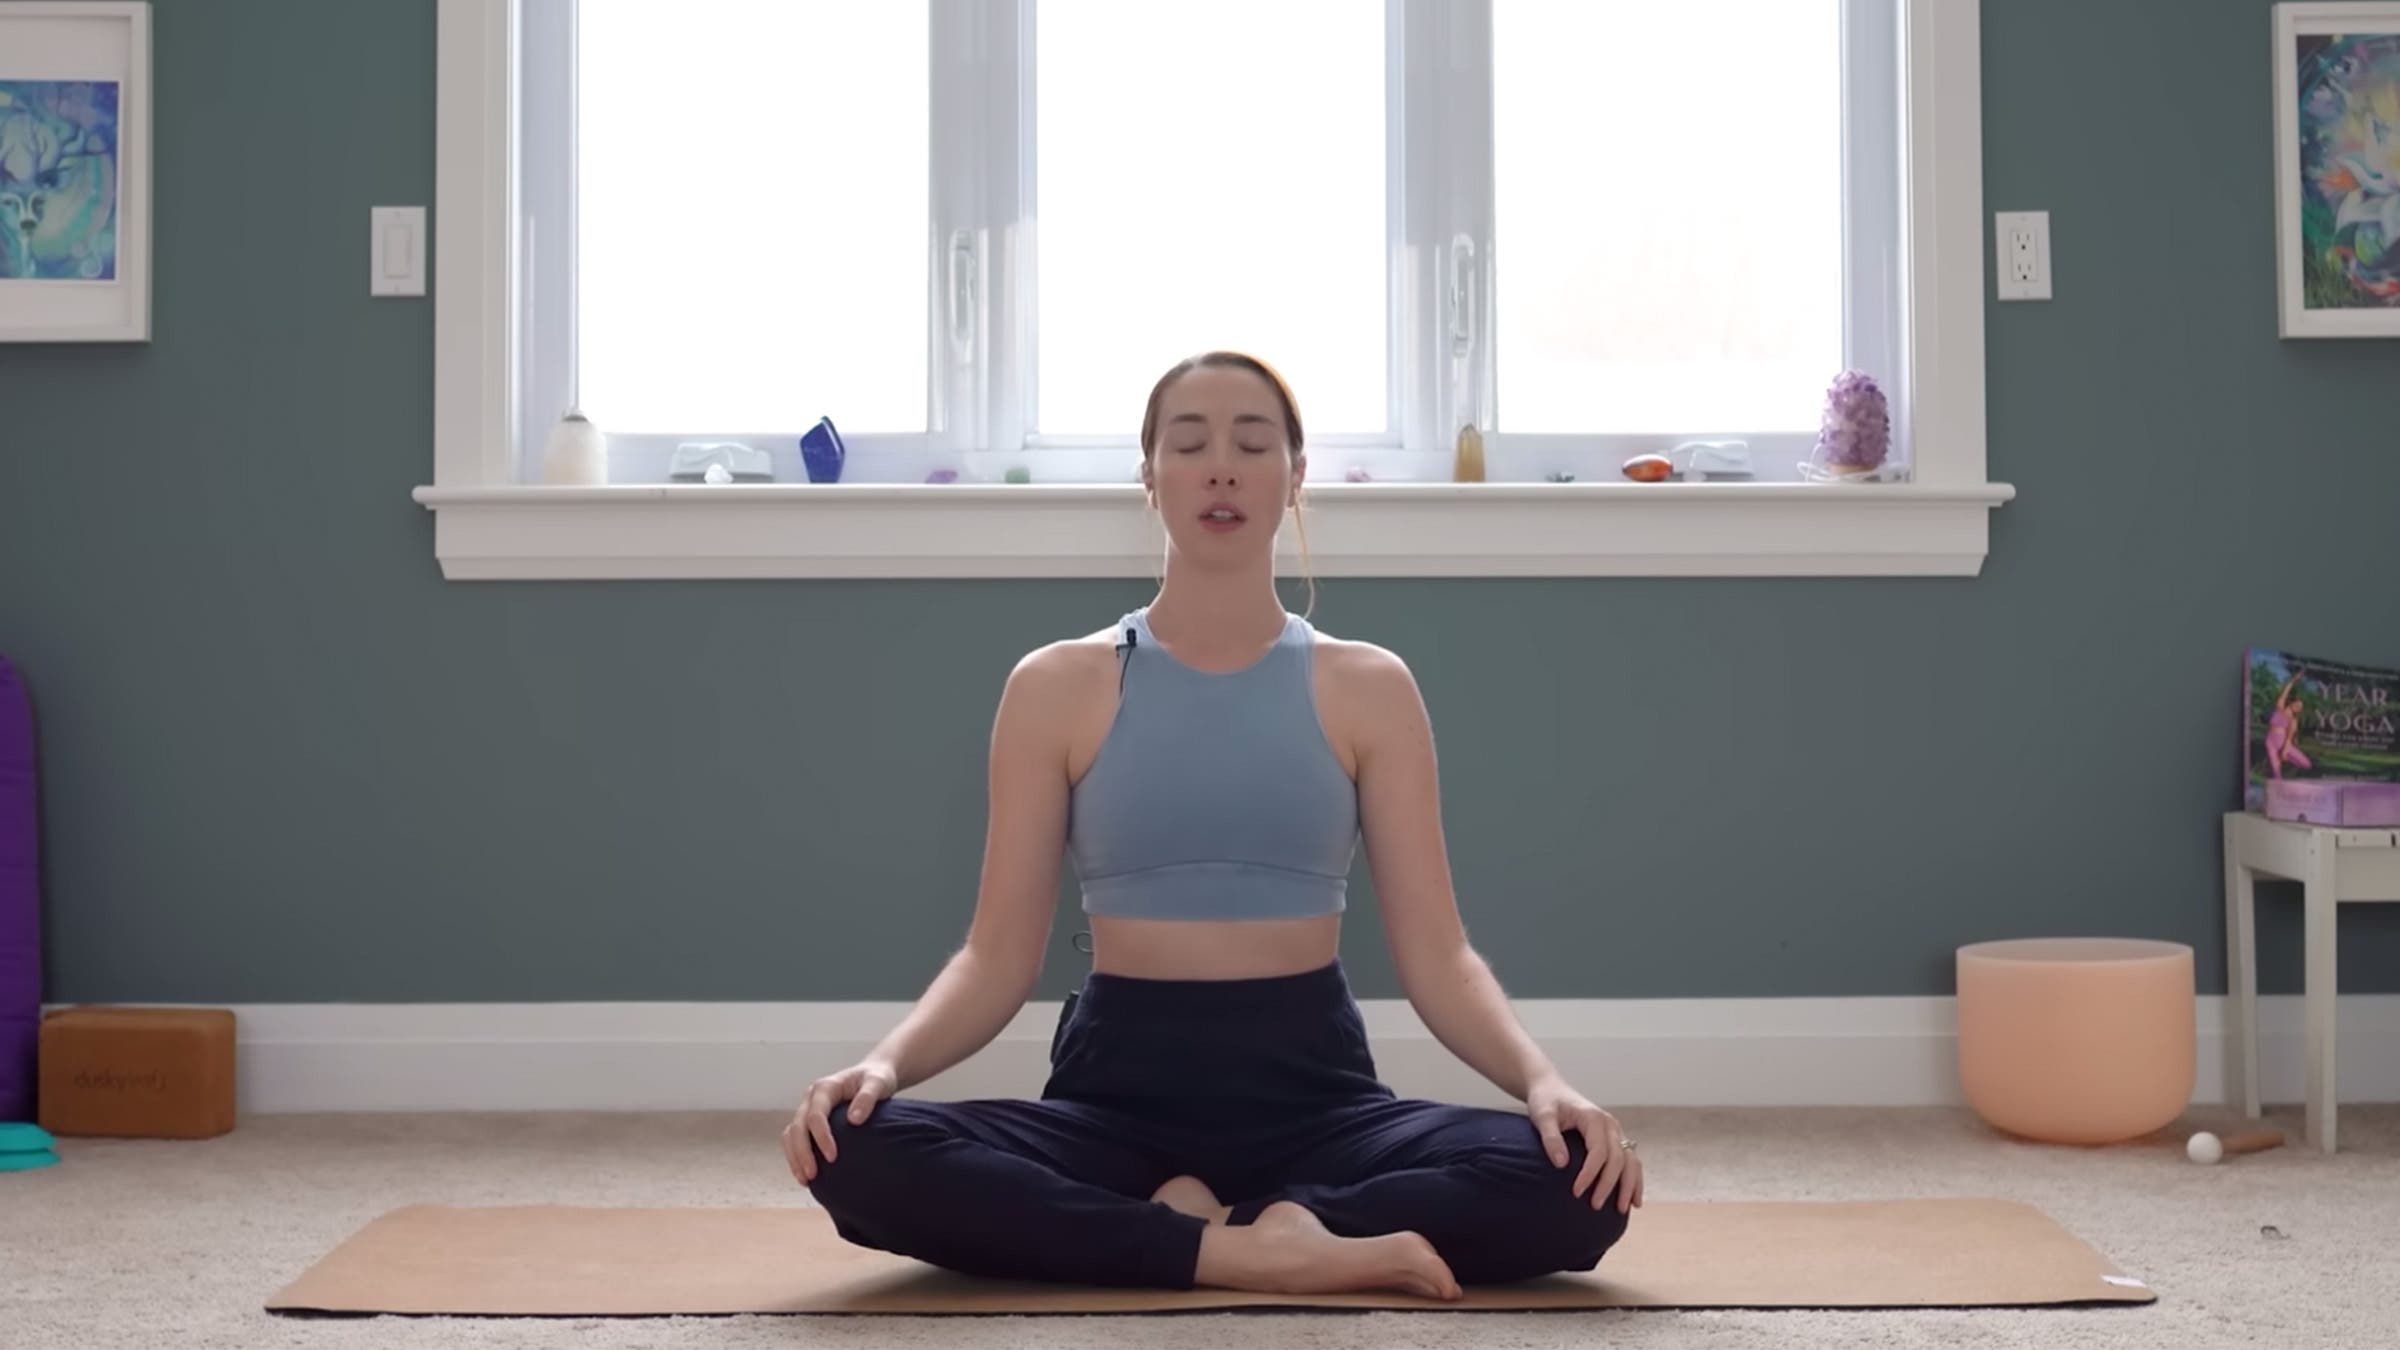
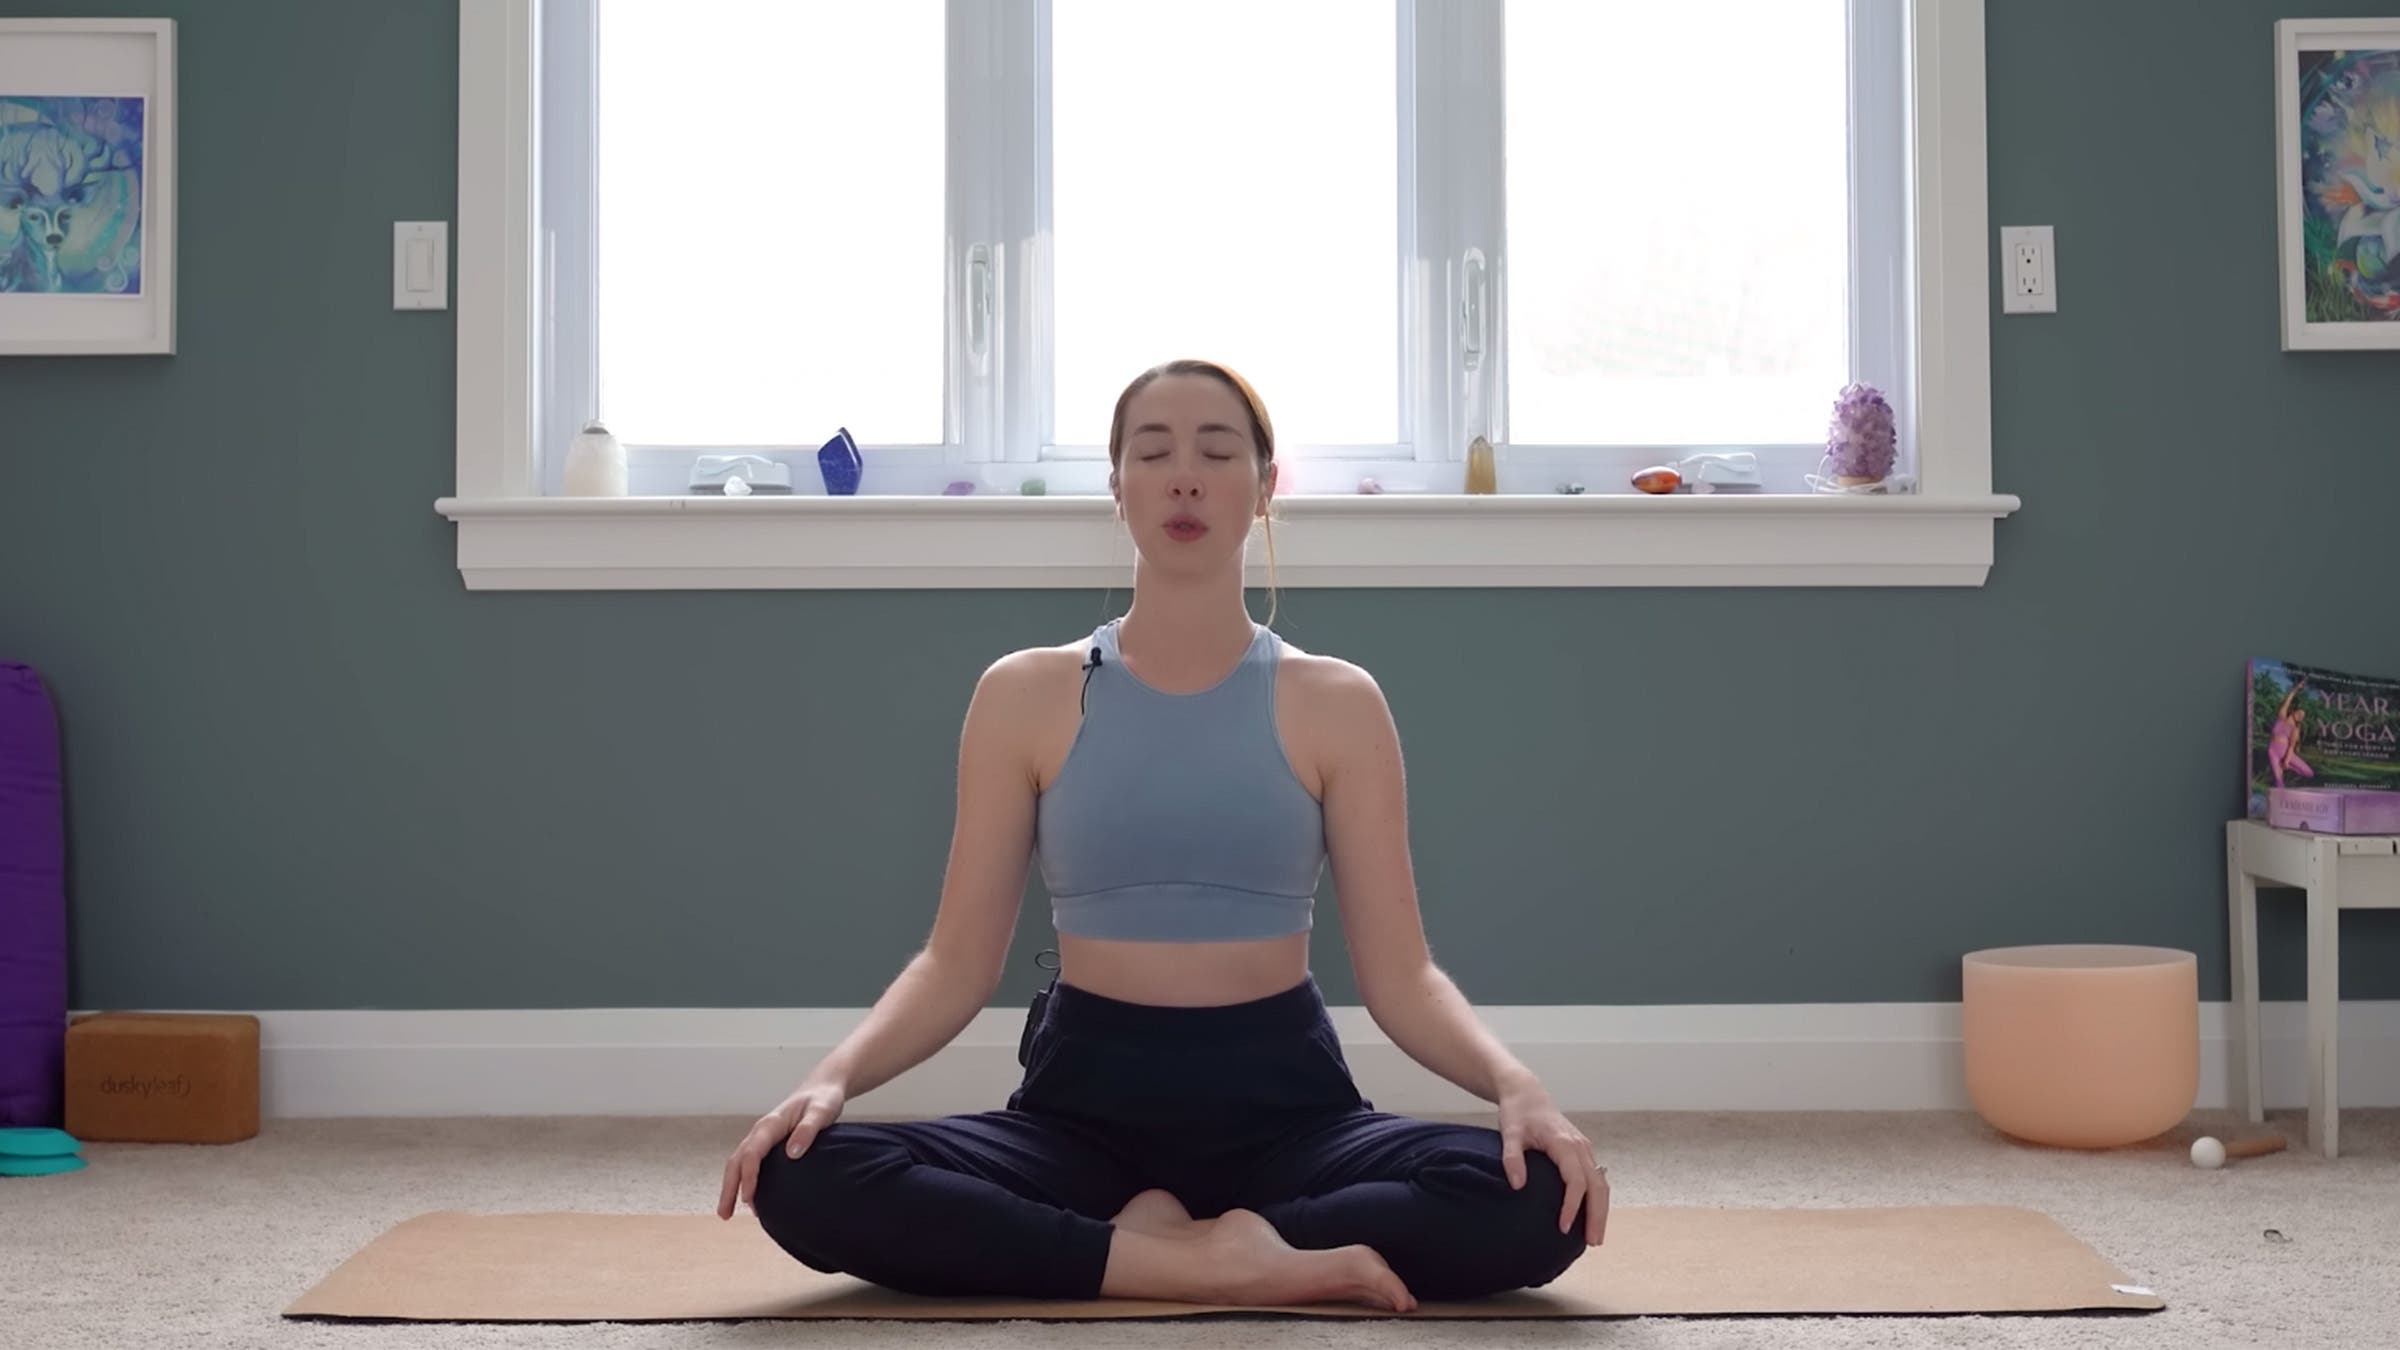
Easy Pose (Sukhasana)
Find a seated position that’s comfortable for your hips and lower back, whether cross-legged or otherwise. Find a gentle lift along your spine as you roll your shoulders down and away from your ears. Keep your chin parallel to the mat as you close your eyes and start your practice with deep breaths, in and out through your nose. Take a moment to check in with how you’re feeling in the present moment. Pay attention to any sensations in your body. If your mind is overactive, simply observe without criticism or the need to fix anything. Allow yourself to take in that information as you simultaneously create space within.
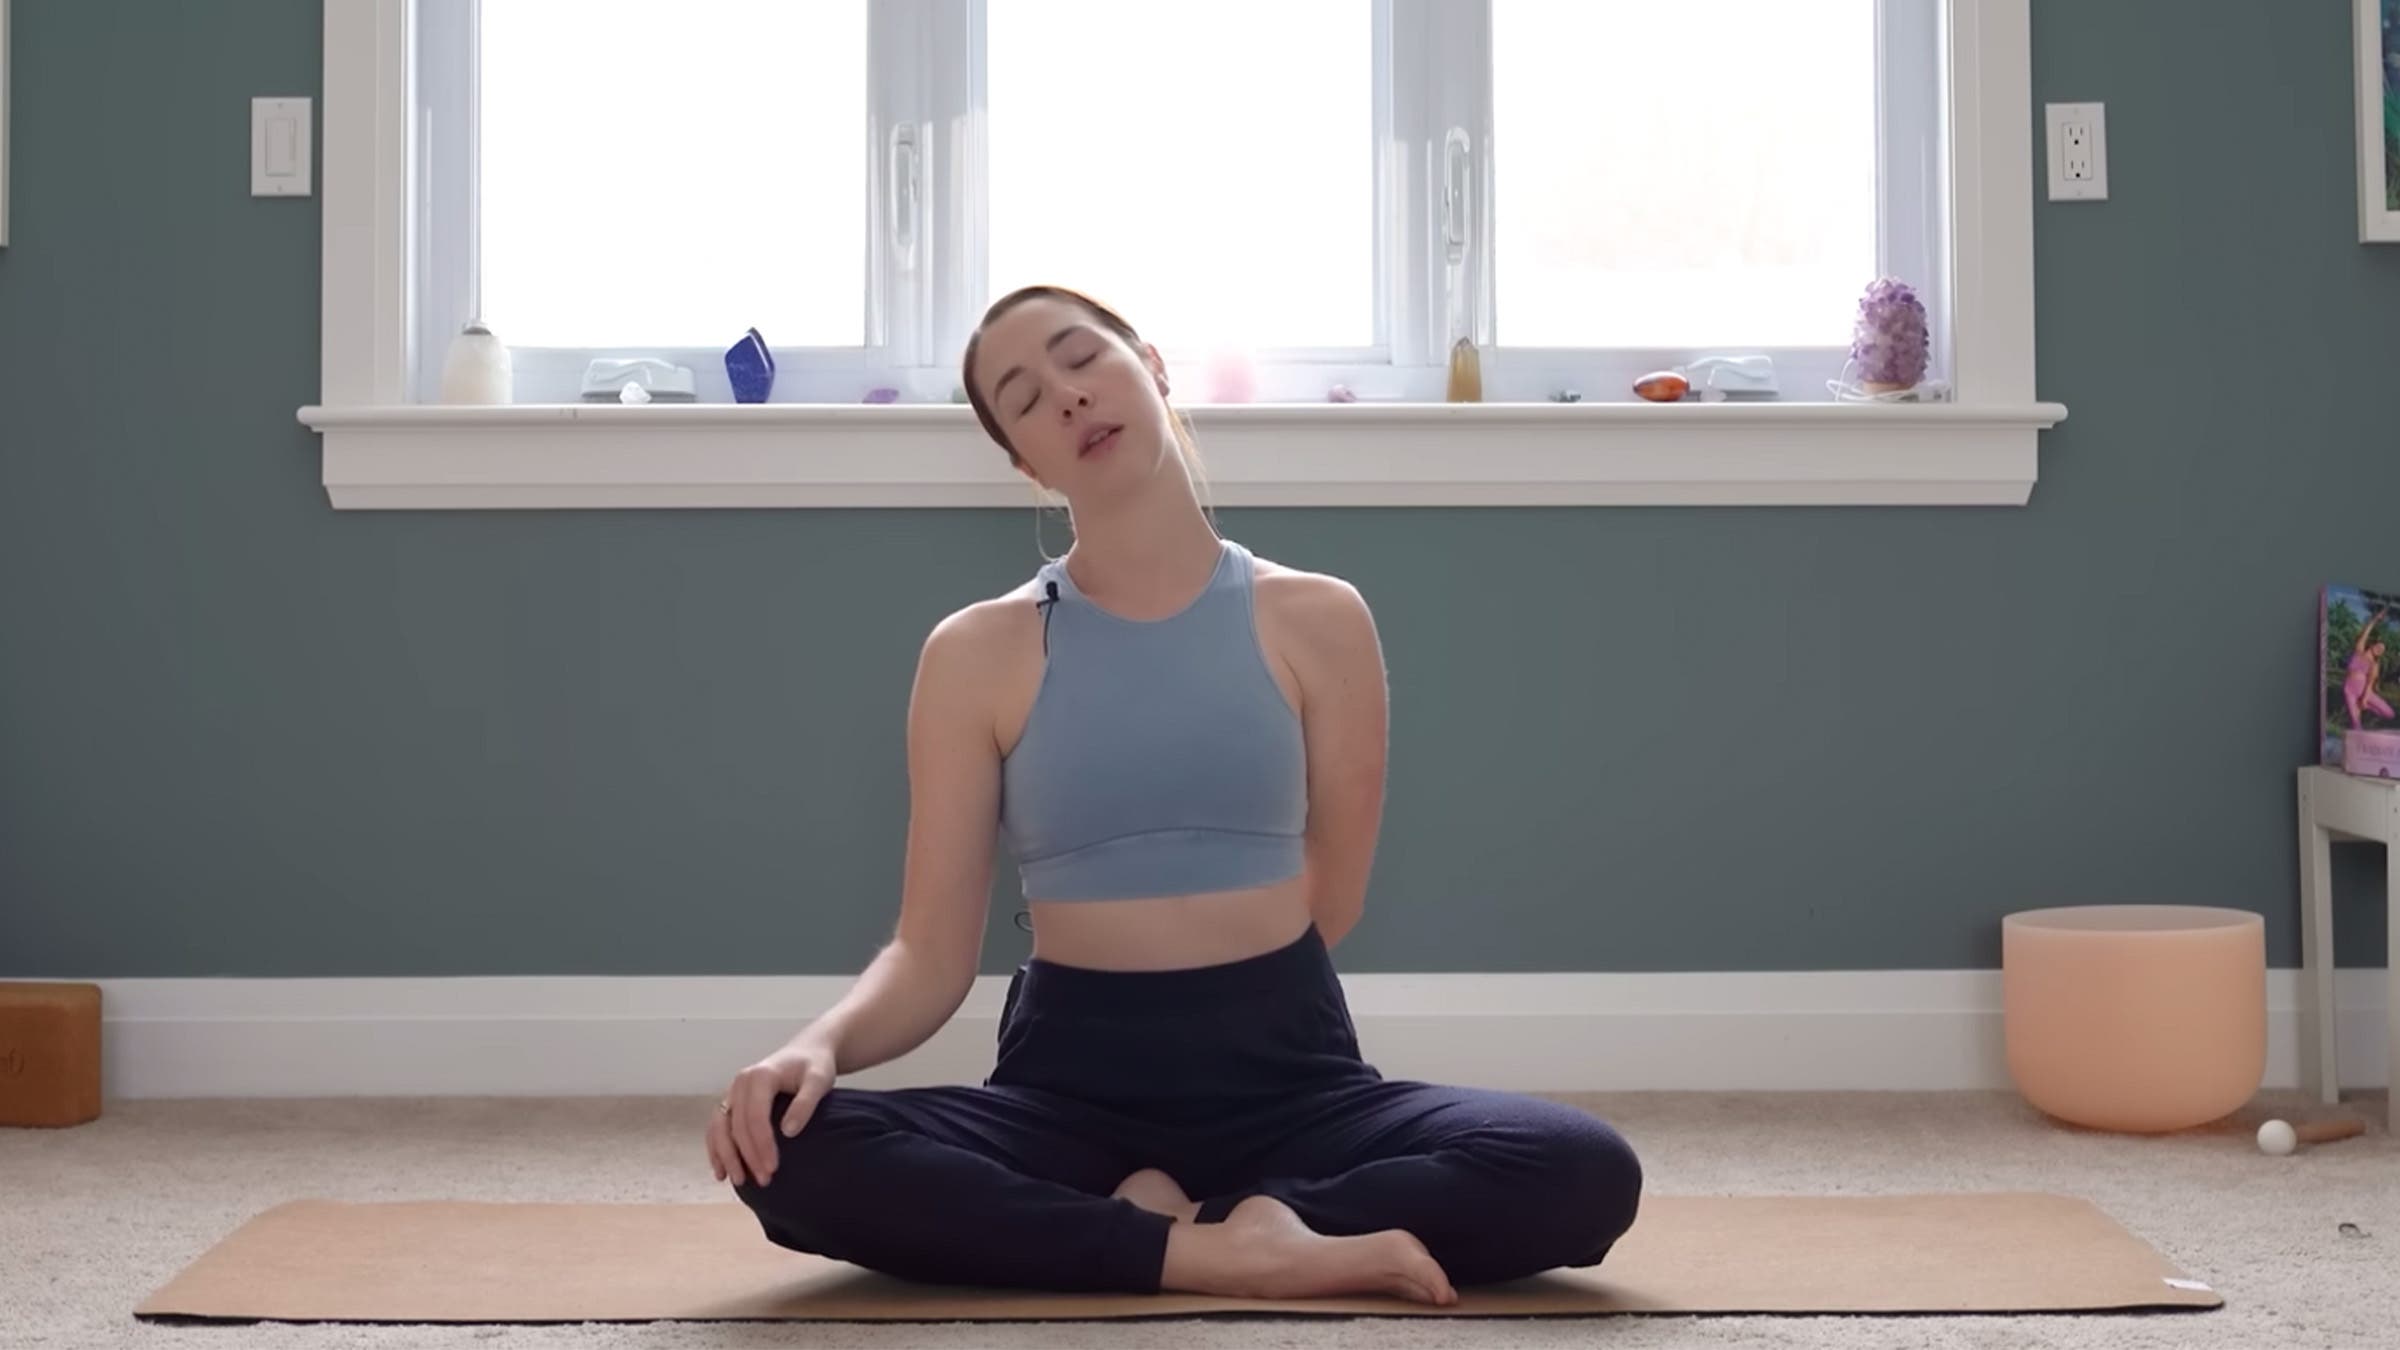
Seated Neck Release
From your seated posture, lean your right ear toward your right shoulder. Consider placing your left hand behind your lower back, palm facing away from you, for an added stretch. The further you reach your left hand behind you, the more you’ll feel the stretch toward the top of your left shoulder. Release your left shoulder down, allowing the weight of your arm to create a deep sensation. After a few breaths here, slowly turn your head to bring your chin over your right shoulder. Take a deep breath into your belly as you feel the change in the stretch. As you exhale, bring your chin back to center and release your arms. Repeat the process on the other side.
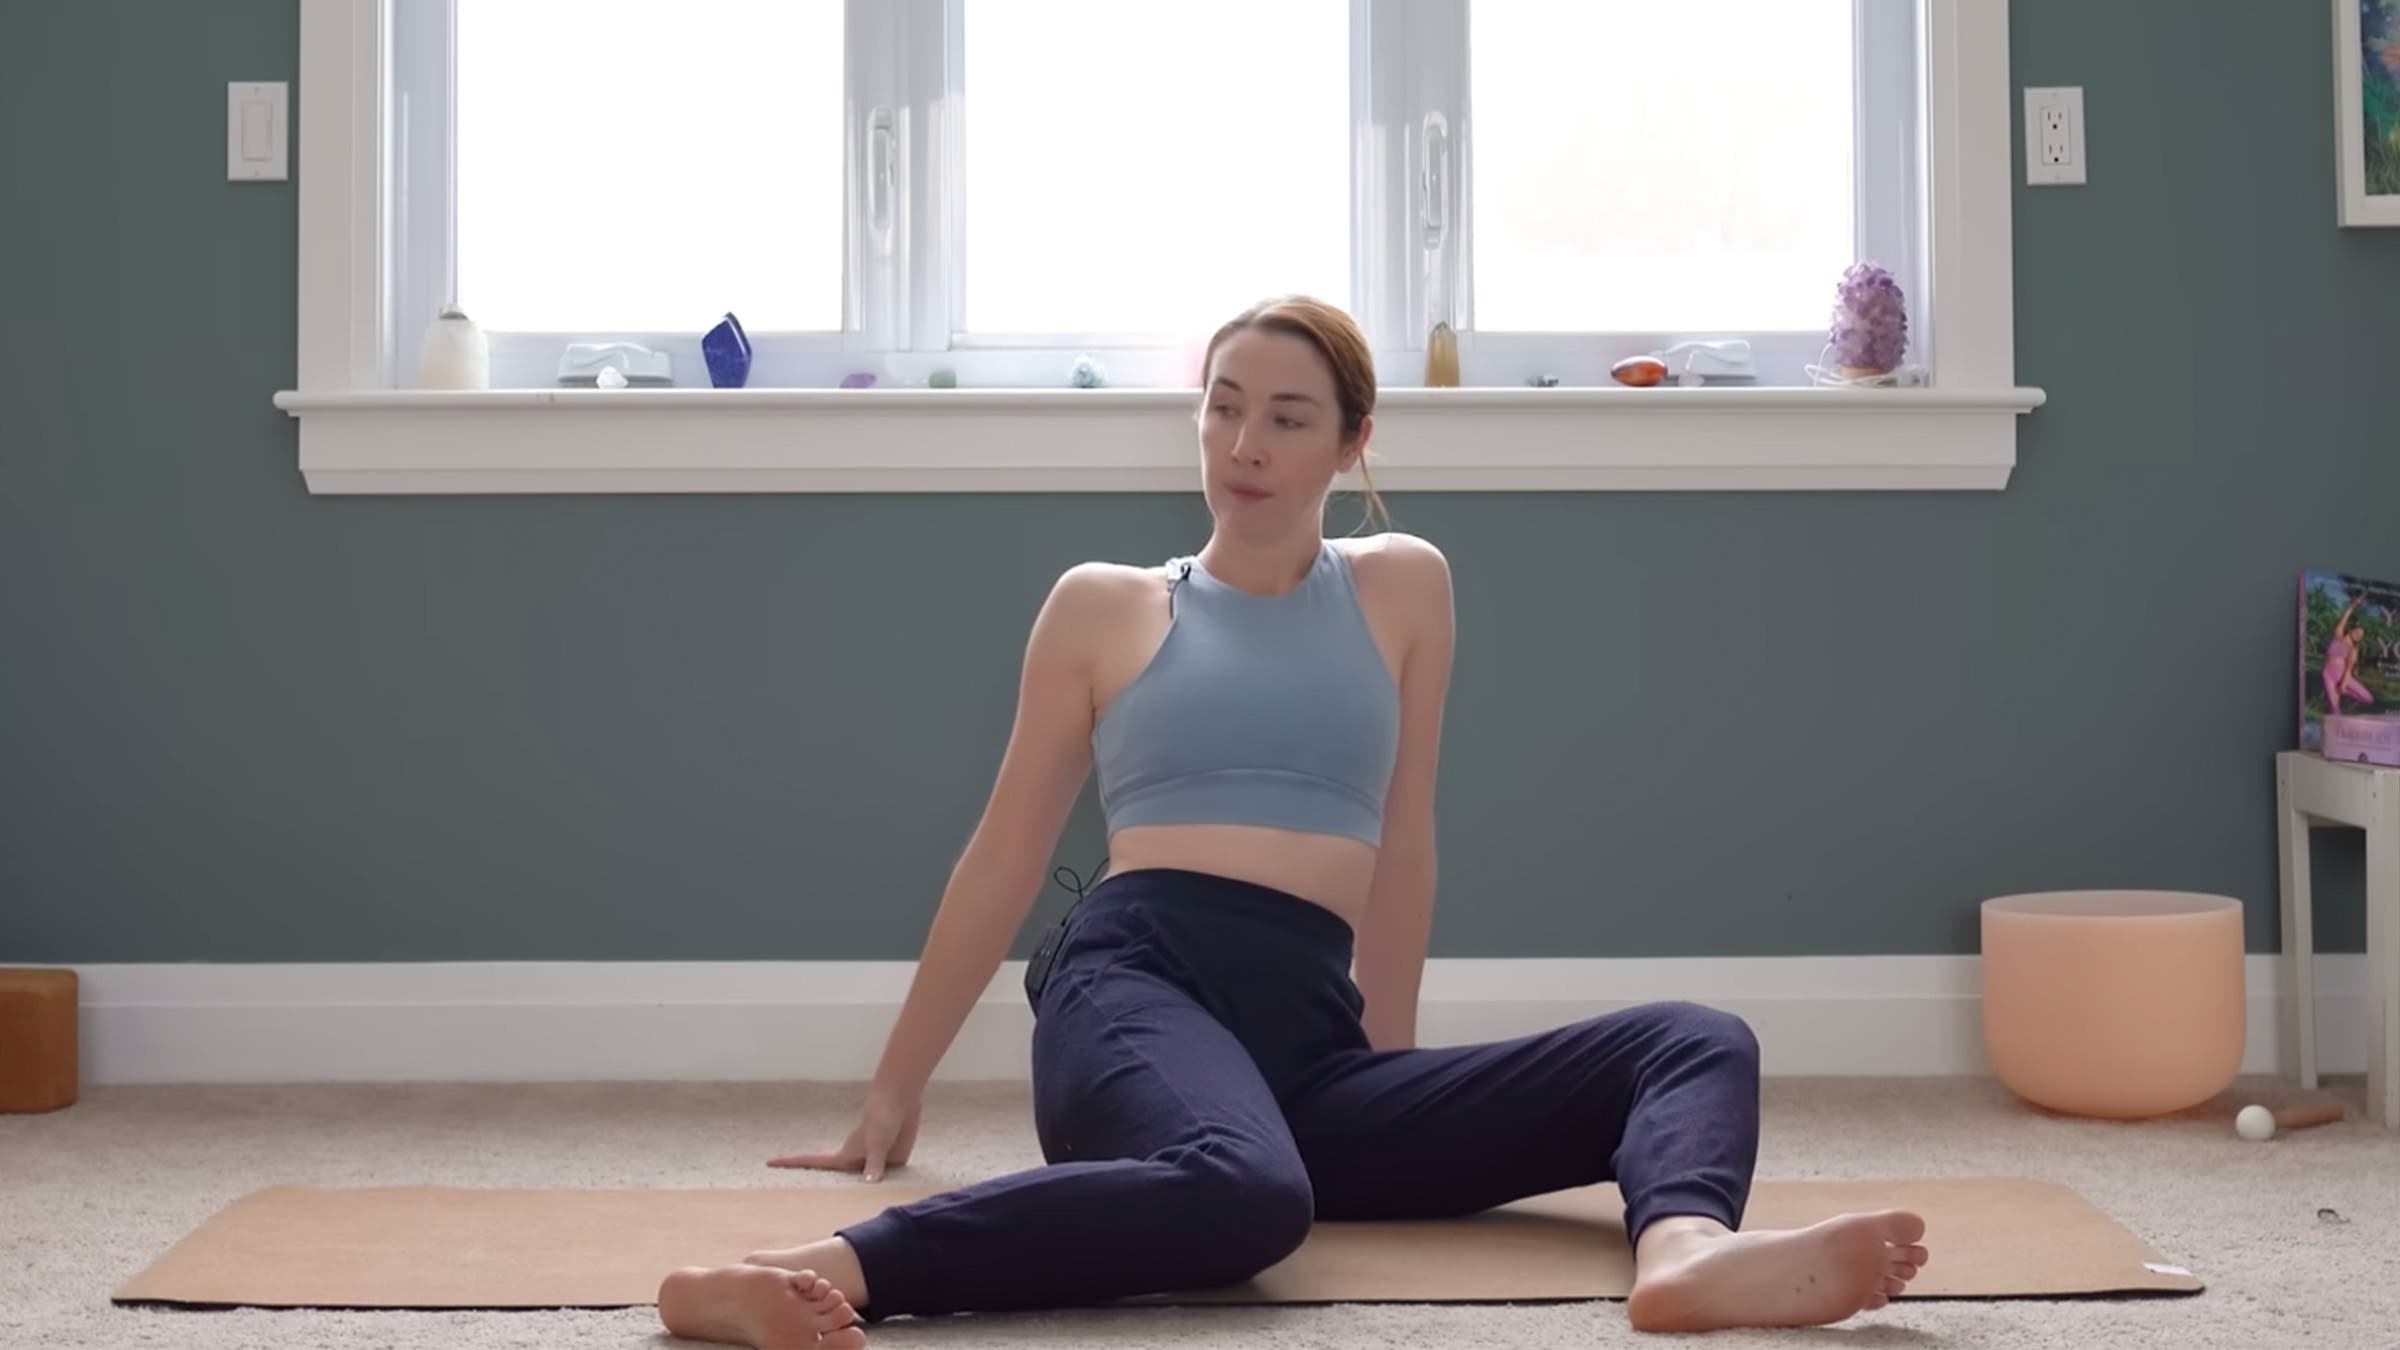
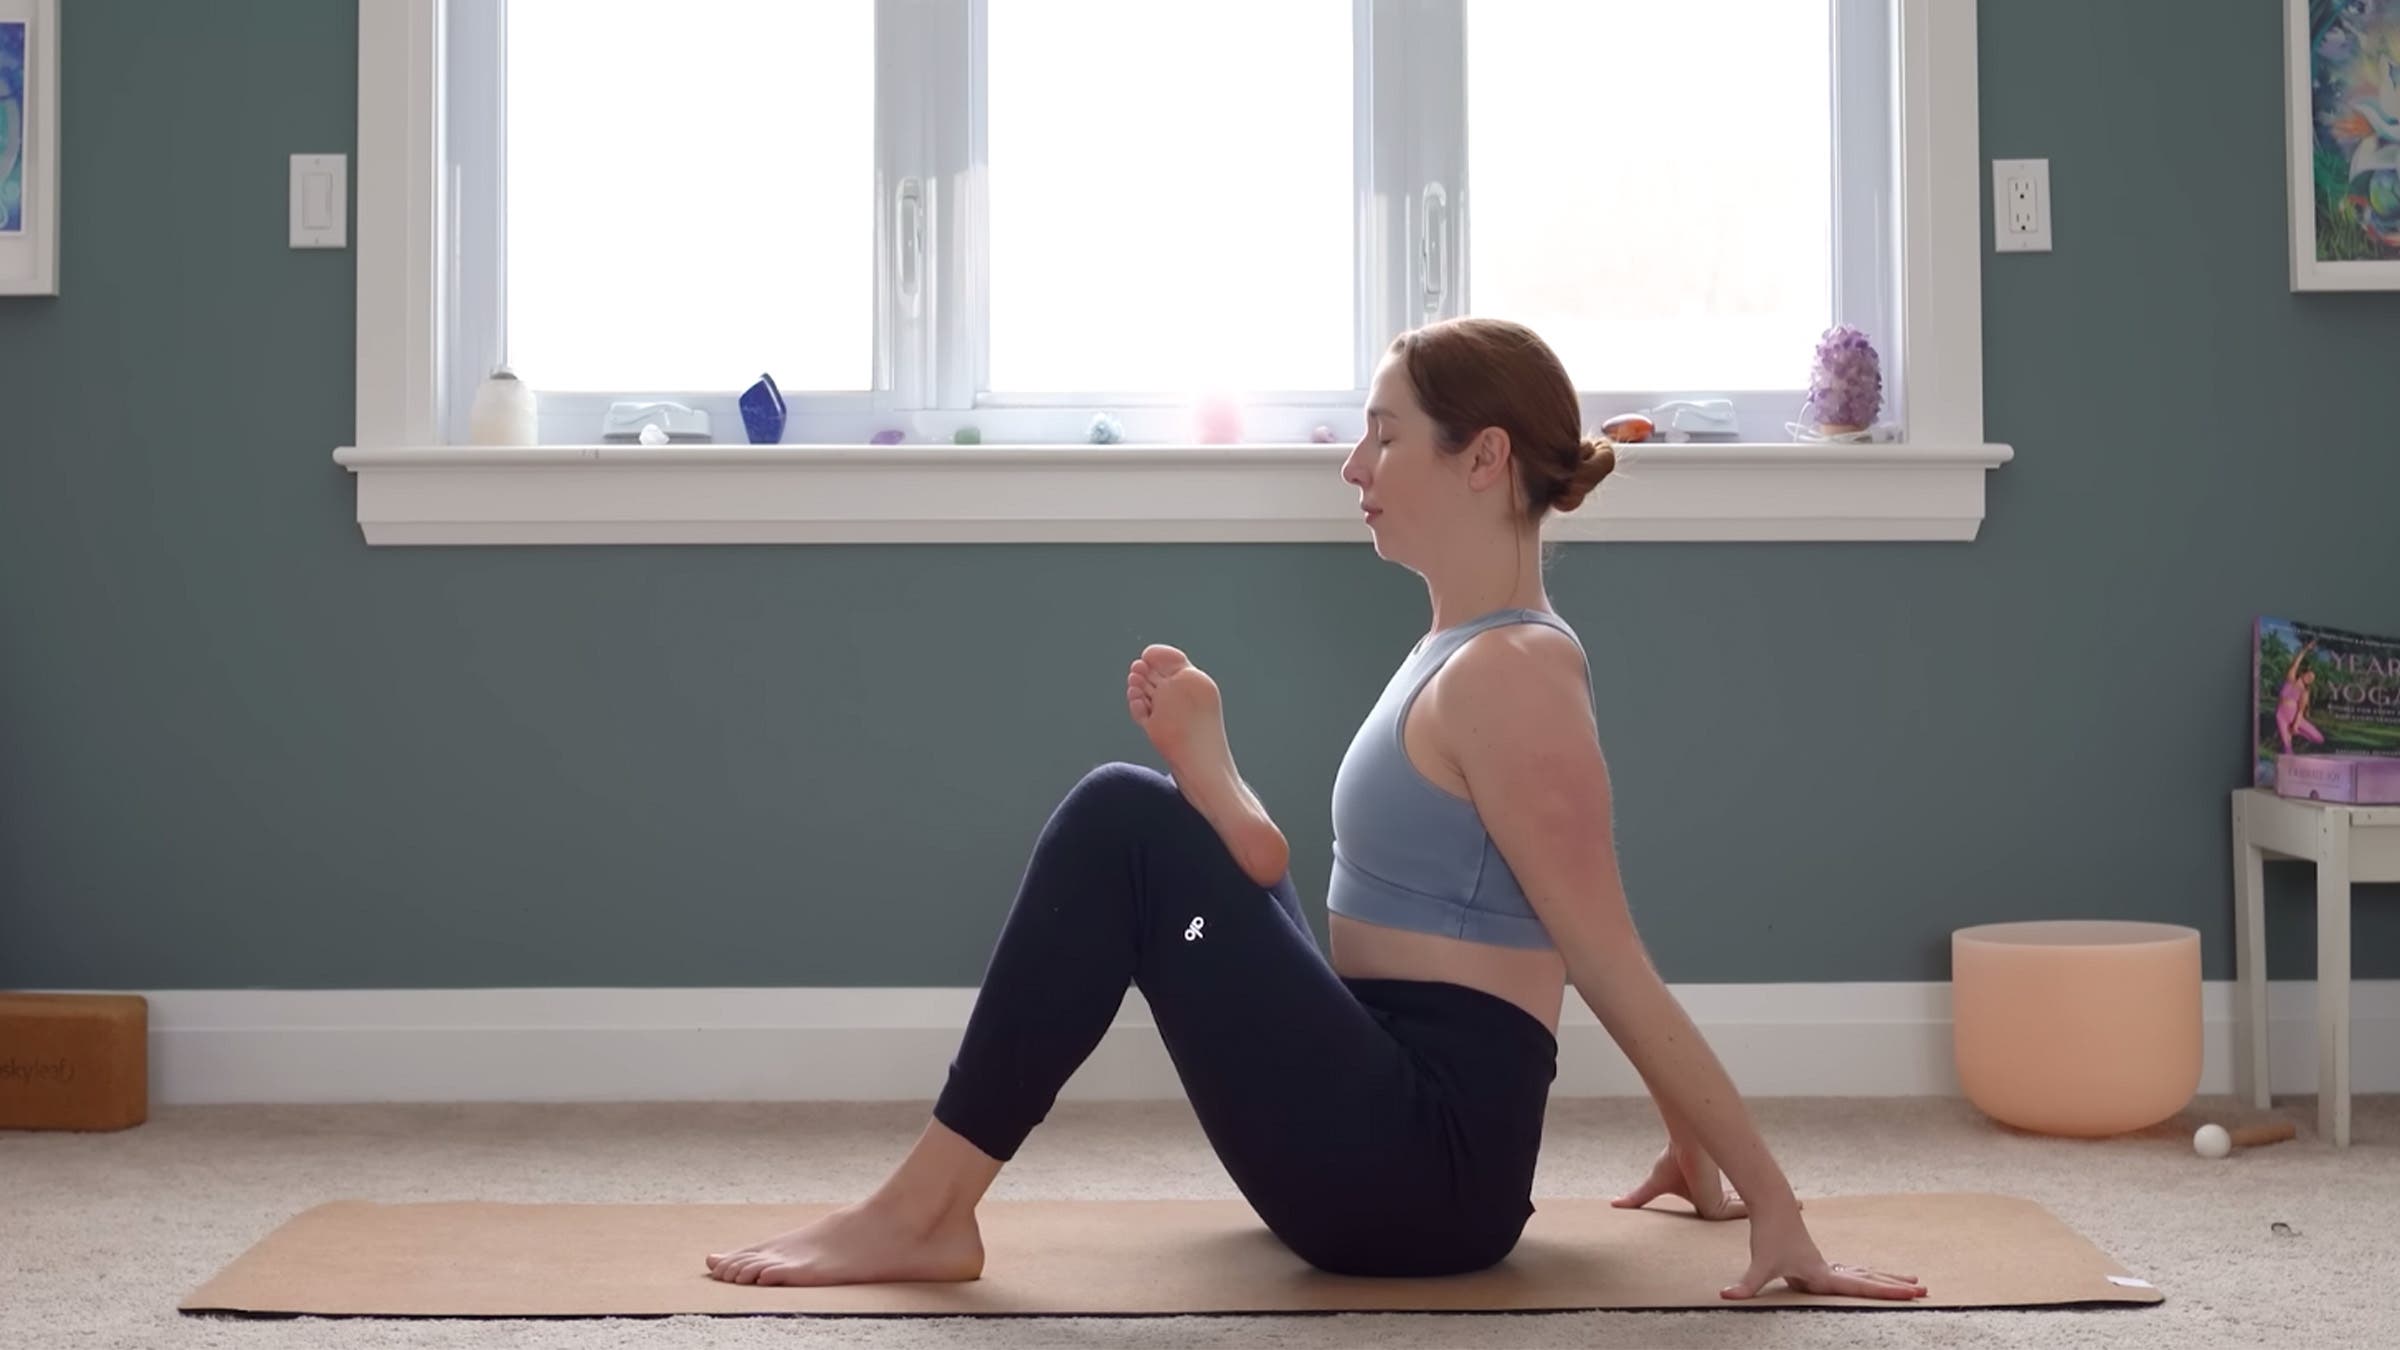
Seated Hip Stretch
Remain seated as you bring your feet flat on the floor with your knees bent and pointing toward the ceiling. Place your hands behind your hips and find a gentle windshield wiper motion with your knees, slowly swaying them from side to side for several breaths. The next time your knees fall to your left, stay here and focus on drawing your right hip down toward the mat. Feel the stretch in your outer right hip. Take a moment to breathe into this stretch. Slowly bring your knees back through center and repeat on the other side.
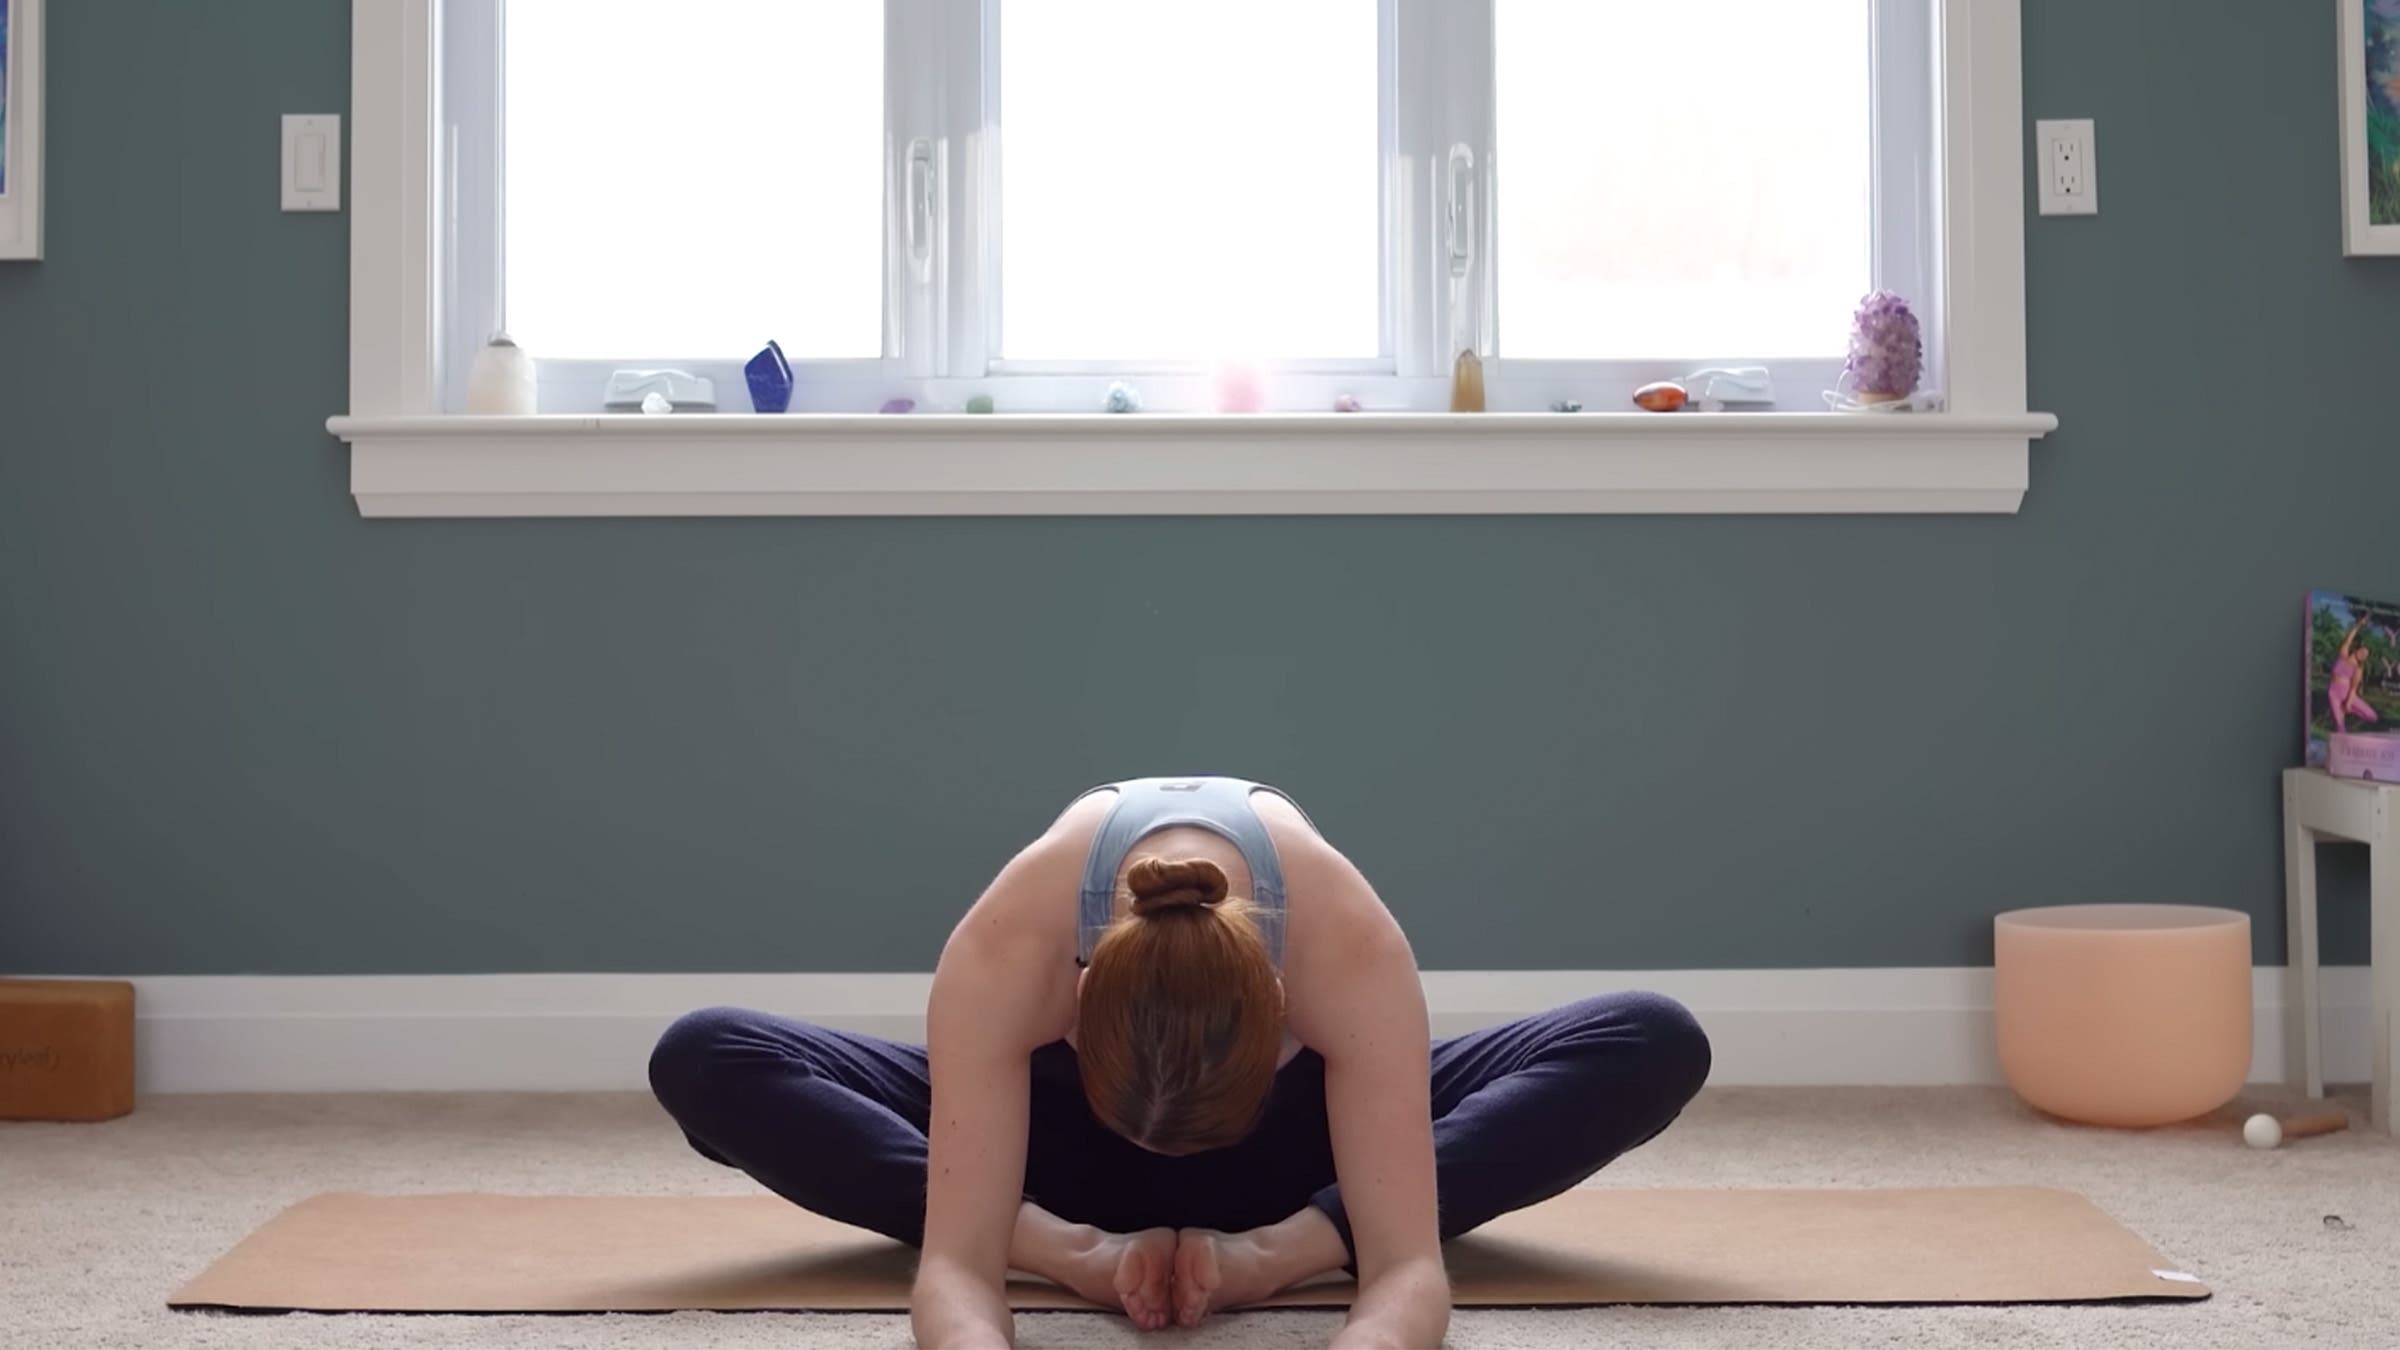
Bound Angle Pose (Baddha Konasana)
Bring the bottoms of your feet together, allowing your knees to fall apart in Bound Angle Pose (also known as Butterfly Pose in yin yoga). Hold onto your big toes with your peace fingers and pause as you squeeze your shoulder blades together and press your thighs toward the mat, creating a subtle backbend.
Inhale deeply through your nose and, as you exhale, bend forward from your hips. Release your grip on your toes and extend your hands in front of you, allowing your spine to naturally round. Embrace the ease of this forward fold, letting gravity do the work rather than pushing or straining.
Surrender to the pose and let yourself melt into the stretch for 3 breaths. Release any thoughts that were occupying your mind. Focus on being present with yourself in the moment, which is an integral part of yoga for stress relief. If your mind starts to wander, redirect your attention to the rhythm of your breath or the sensations in your body.
After 3 breaths, push your hands onto the floor, gradually curling back up, inch by inch. There’s no need to rush this process. Take it at your own pace.
Seated Pigeon Pose Variation
Straighten your legs in front of you. Cross your right ankle over your left knee, then bend your left knee to a comfortable extent. Place your hands behind you for support and lift your chest. You can adjust the intensity of the stretch by bringing your left foot closer or further away from you. Feel free to gently sway your leg and hips from side to side.
Stay here for 5 deep breaths and then slide your left leg straight again and uncross your legs. Switch to the other side, finding a position that suits you best.
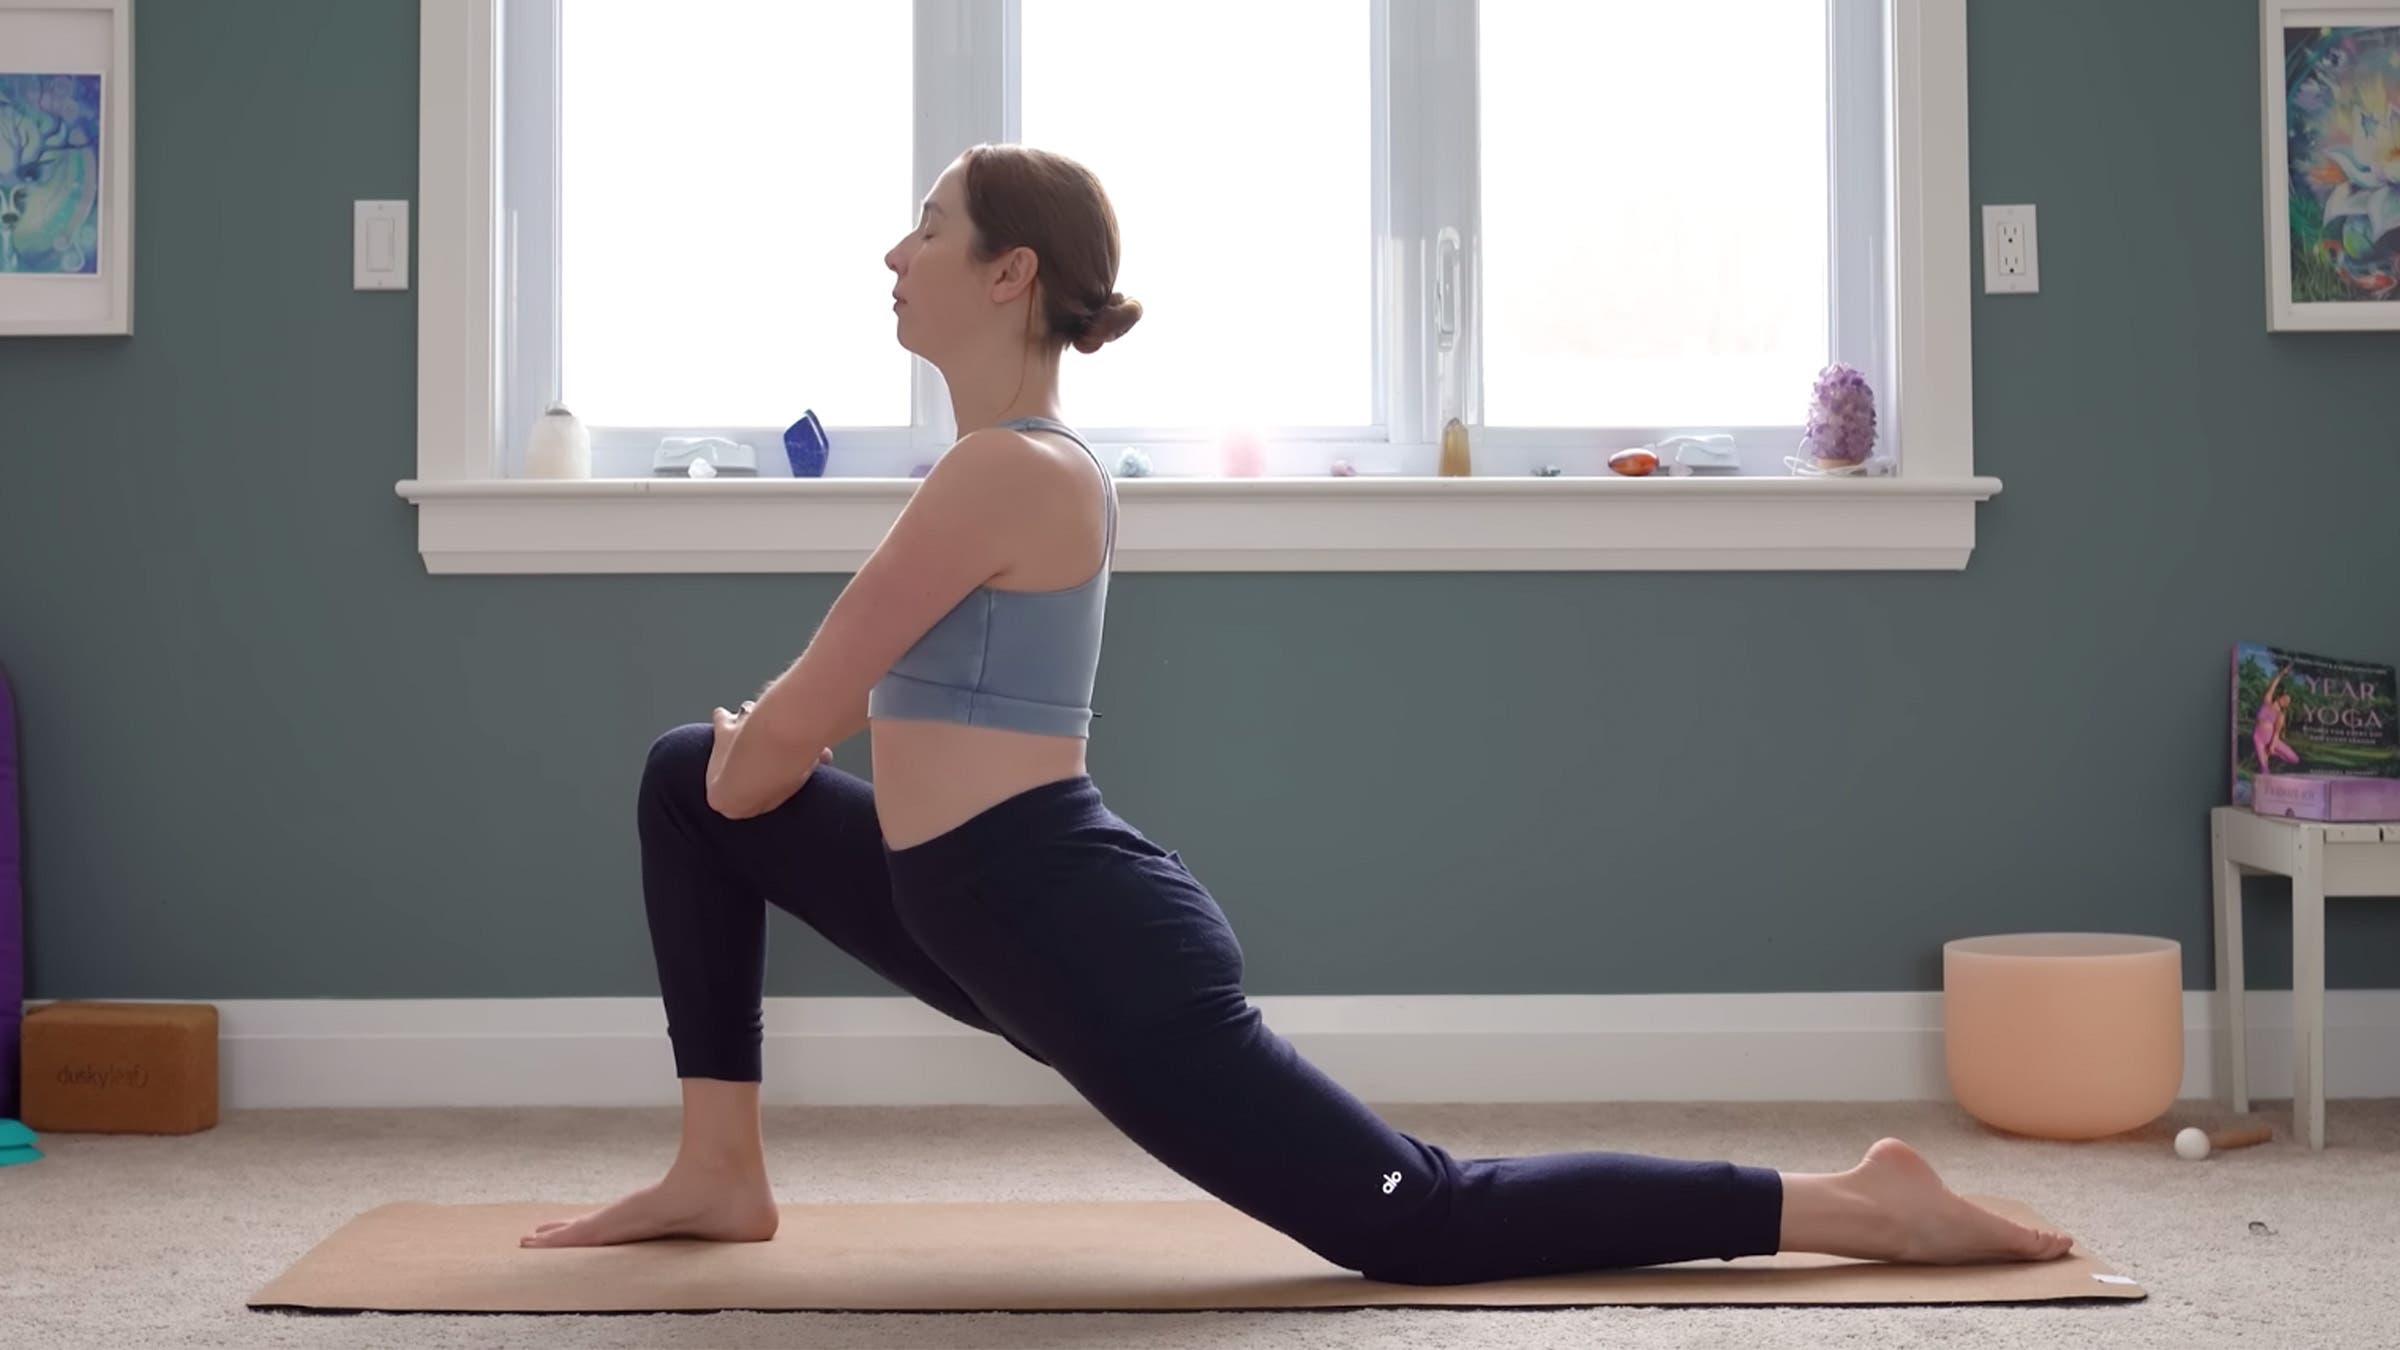
Low Lunge (Anjaneyasana)
Straighten both legs and slowly transition to your hands and knees. Place your palms under your shoulders and your knees under your hips. Move into a Low Lunge from here by stepping your right foot forward to the top of the mat. Align your knee over your ankle and choose whether to keep your fingertips on the mat or bring your palms to your right thigh.
You can introduce a subtle backbend here by releasing your hips down and focusing on stretching into your left thigh and left hip. Be mindful of your lower back—ensure there’s no discomfort or pinching. If needed, keep your palms down on the mat for added support. Both options offer benefits, so choose what feels right for you.

Rag Doll
From Low Lunge, tuck your back toes, lift your back knee off the mat, and step or inch your left foot to the front of the mat and come into a Standing Forward Bend. Feel free to take your feet wider than your hips. If you like, bend your knees generously.
Grab opposite elbows or dangle your upper arms, swaying gently from side to side. Avoid leaning on your heels or the balls of your feet, establishing a central point of gravity. Make sure your weight is evenly distributed between your feet. Allow your head to become even heavier, envisioning it to be like a bowling ball.
From here, transition smoothly into a low lunge on the other side. Step your right foot all the way back and lower your right knee to the mat.
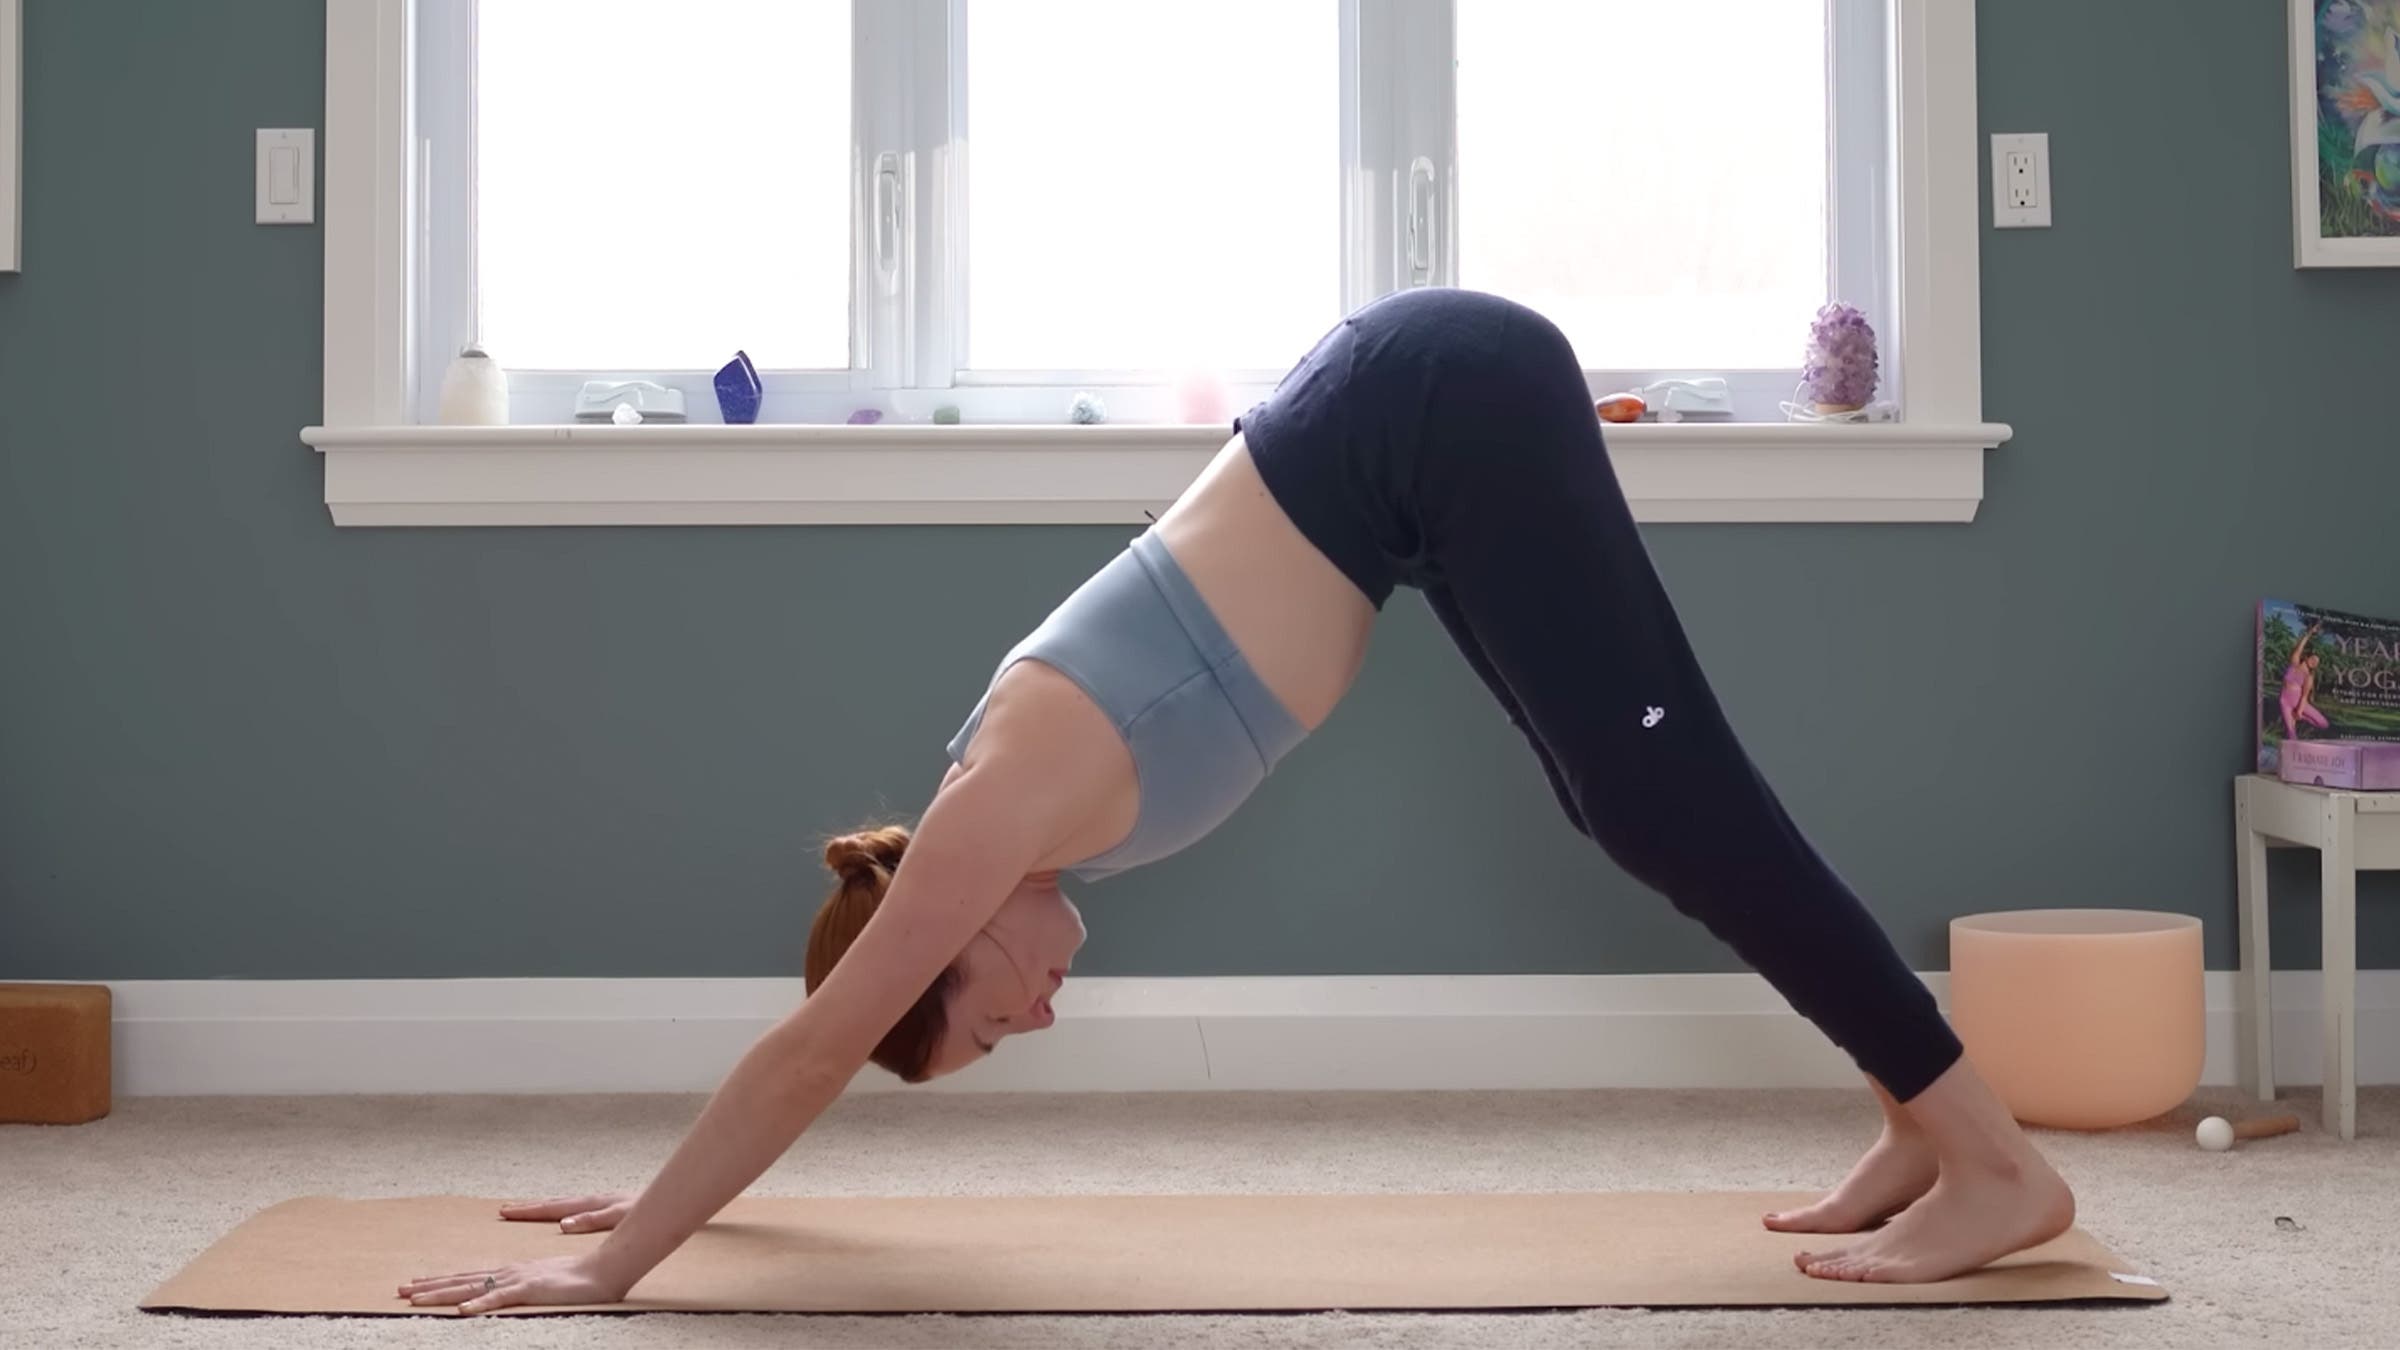
Downward-Facing Dog (Adho Mukha Svanasana)
From your Low Lunge, tuck your back toes and lift your back knee off the mat. Instead of stepping to the top of the mat, transition into Downward-Facing Dog by stepping your left foot back. Ensure your hands are at least shoulder-distance apart and your feet are hip-distance apart. Feel free to bend your knees as you reach your chest toward your thighs to find a comfortable position.
Engage in any little movements that bring relief or comfort. The goal of this pose is to achieve a full-body stretch. Curl your tailbone up, draw your lower belly in, and take a deep breath. As you hold this position, focus on elongating your spine and opening up through your shoulders and hamstrings.
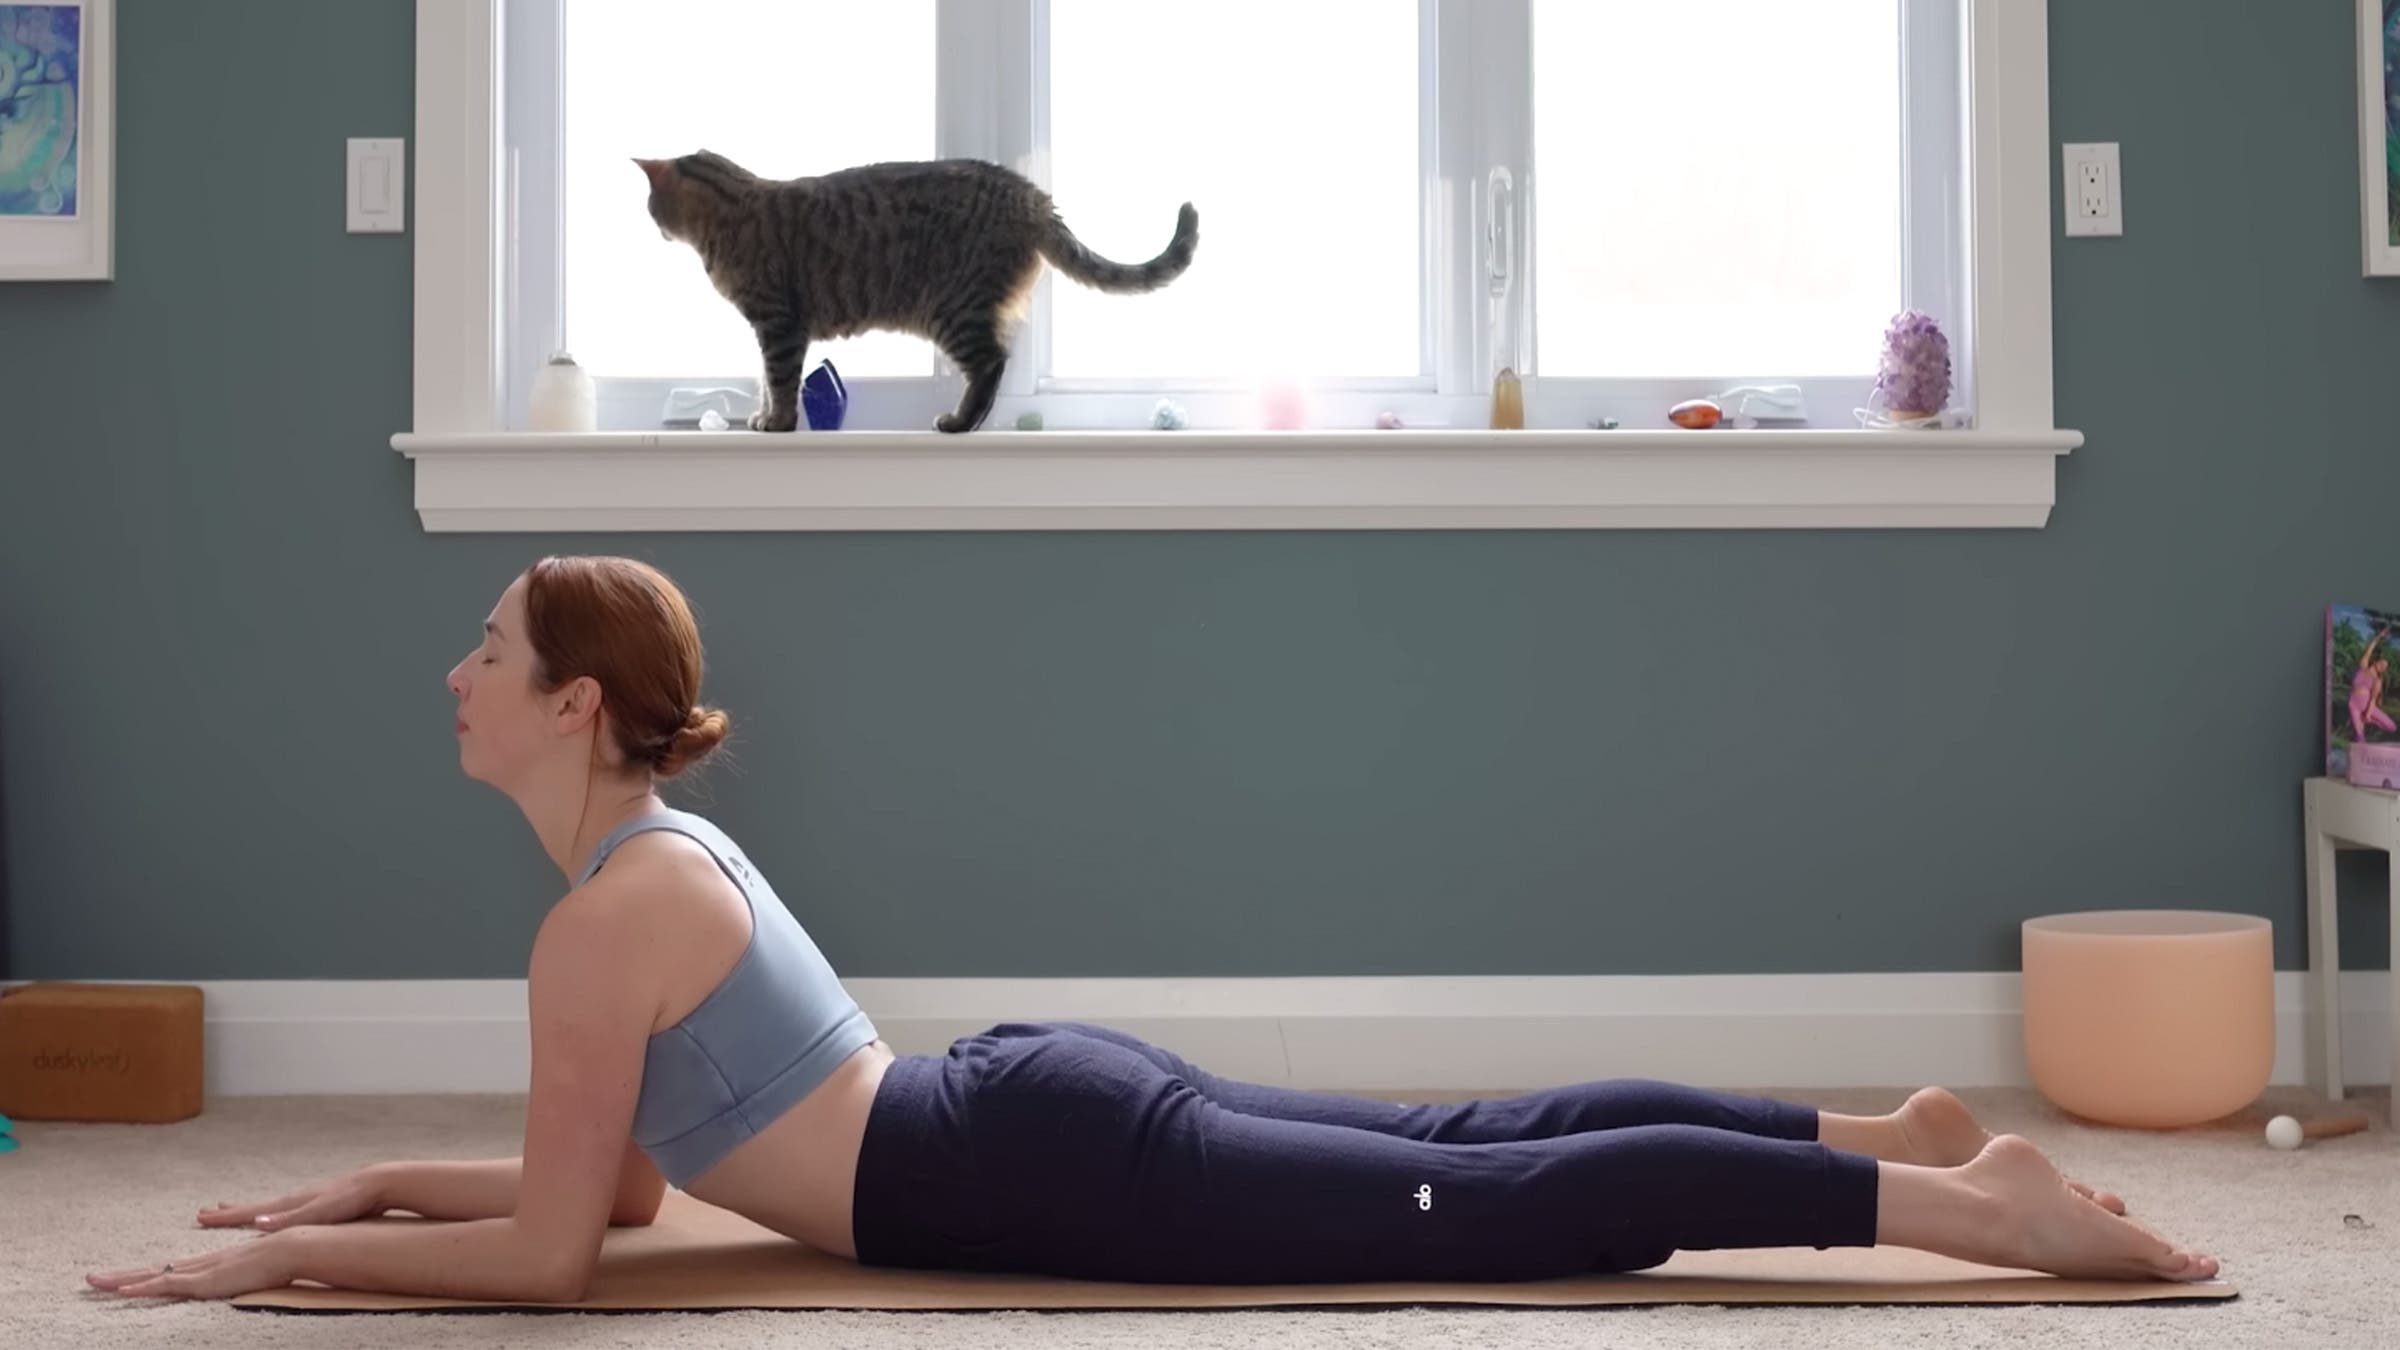
Sphinx Pose
From Downward-Facing Dog, lower your knees to the mat and come onto your belly. Bring your forearms to the mat, parallel to one another, ensuring your palms are flat on the mat. Lift your chest and roll your shoulders back and down. As you settle into Sphinx Pose, lightly press the tops of your feet—including each toe—into the mat. Also focus on pushing your pubic bone into the mat while lengthening your tailbone toward your heels. This alignment helps avoid tension in your lower back and redirects the stretch toward your mid and upper back. Stay here for five deep breaths.
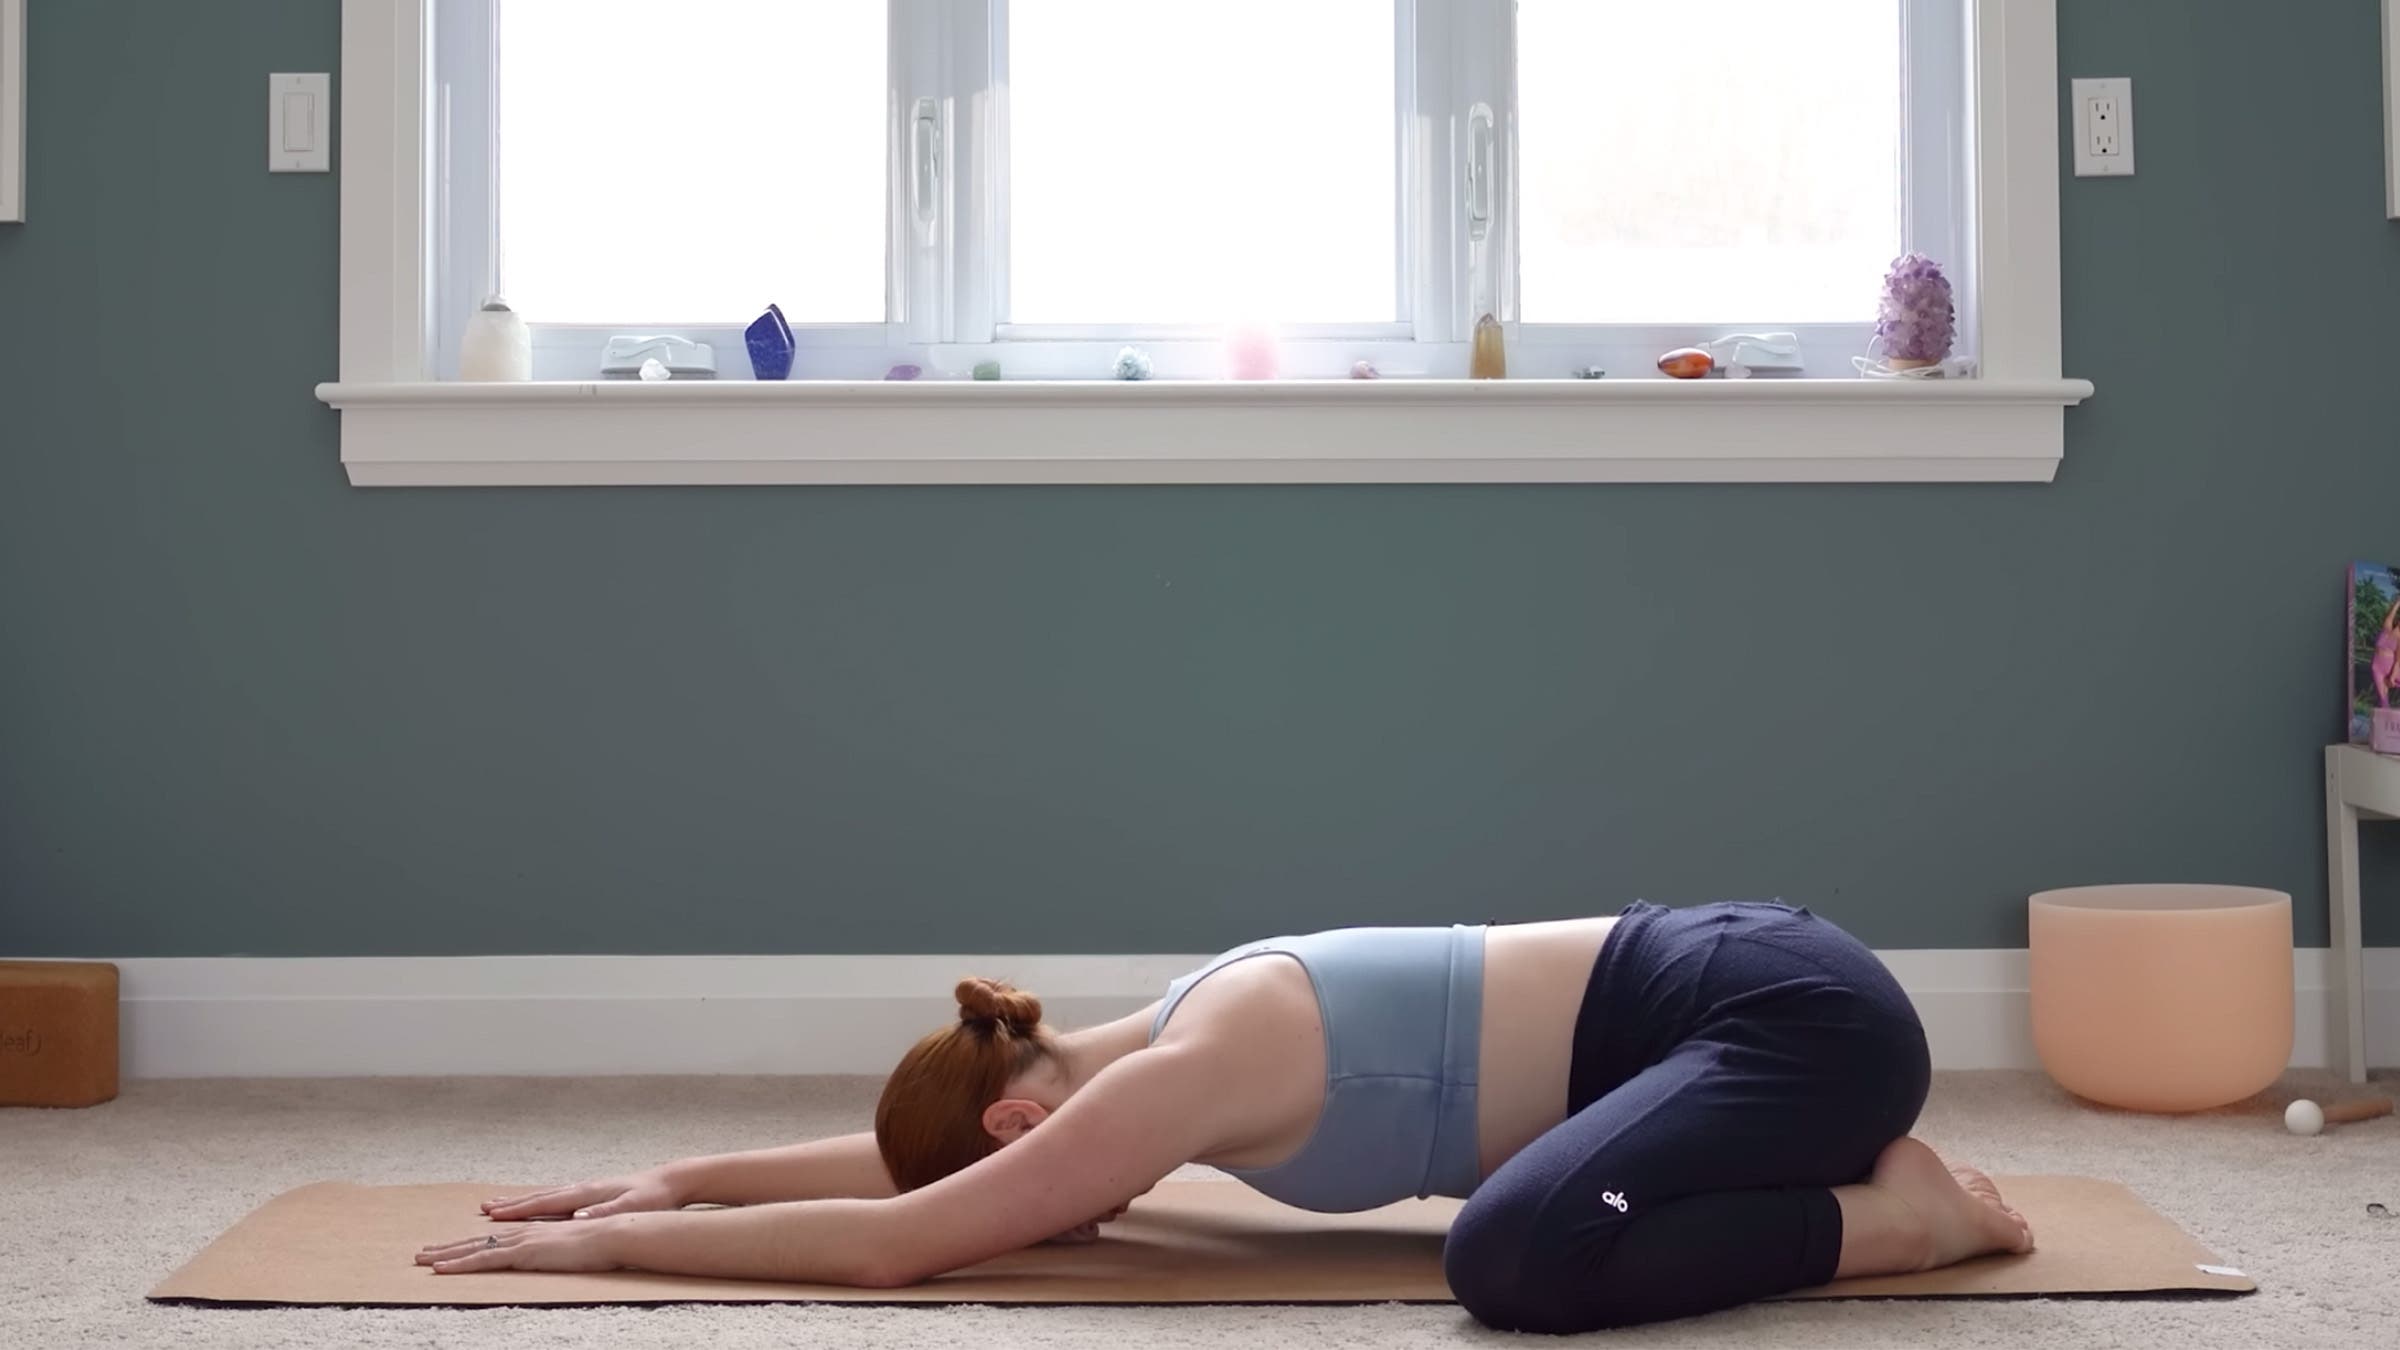
Child’s Pose (Balasana)
From Sphinx Pose, ease into Child’s Pose by bringing your big toes together, pressing your hips back toward your heels, and letting your knees widen to your desired comfort level. The wider your hips, the deeper the stretch. As you release your hips down, walk your hands in front of you and bring your chest toward the mat. Take 5 breaths in this position, allowing yourself to ground and check in with your body. Let gravity gently pull you deeper into the stretch, embracing the soothing sensation of Child’s Pose.
Box Breathing
From Child’s Pose, walk your hands beneath your shoulders and lift your chest. Slowly come to a seated position similar to the beginning of the class for a simple yet effective breathing technique called box breathing, or Sama Vriti Pranayama. “Sama” translates to “equal” and “vriti” refers to “mental fluctuations,” making box breathing a technique that harmonizes breath and reduces mental chatter, providing stress relief.
Visualize a box as you practice this technique: Inhale for a count of four, hold your breath for four, exhale for four, and hold your breath out for another count of four. Repeat this cycle five times, maintaining a steady breath in and out through your nose while sitting up tall.
As you finish your 15-minute yoga for stress relief practice, let yourself return to your regular breathing pattern. Linger here a little longer and simply pause before you come back to your day.
This article has been updated. Originally published December 11, 2023.

")


