Published December 22, 2025 01:30PM
You know the hips. You know the quadriceps. But do you know the muscles that link the two?
Need some hints? They help lift your legs so you can walk. They’re also the exact place in your back leg where you likely feel the most stretch in a lunge.
If you guessed the hip flexors, you’re correct! This team of muscles resides at the front of the hips and help your leg and pelvis move as a single unit. And if this area has ever felt tight, stuck, strained, or even a little pinchy at the end of the day, you’re not imagining it.
This tends to happen in those who sit for hours, travel often, run, cycle, or train hard at the gym. Namely, people who regularly experience their hip flexors in a contracted, or shortened, position may not be using them in a way that keeps these muscles resilient and adaptable. In other words, if your hip flexors aren’t happy, you’ll feel it—sometimes in your hips, sometimes in your lower back, and sometimes in your stride.
Hip flexor tightness doesn’t always need a more intense stretch—it usually requires a smarter balance of stretching, strengthening the surrounding muscles, and steady breath. That’s exactly what yoga for the hip flexors helps with.
What Hip Flexors Actually Do—And Why They Matter
Hip flexors—most notably the psoas, iliacus, and rectus femoris—are part movers, part stabilizers, and play a role in almost everything you do. They keep your posture upright and your spine comfortable. They also help transfer your weight smoothly when you walk or run so that movement feels fluid instead of “yanky” in the low back. And they’re involved when your leg moves behind you (also known as hip extension), which happens each time you take a step but is an especially big deal for runners and cyclists.
Many of us don’t regularly train hip extension in a controlled way, and the body’s range of motion becomes restricted. Stress plays a role, too. When you’re rushing through life and taking shallow breaths, the body braces—the psoas, in particular, can tighten even more. That’s why relieving tight hip flexors isn’t just a physical matter; it involves settling your nervous system, too. That’s how yoga can improve hip flexor flexibility.
But the magic isn’t in forcing deeper shapes. When you practice yoga with intentional alignment, you lengthen the area in front of your hips without dumping into your lower back. Breathwork matters just as much: slower breathing and longer exhalations calm the nervous system, which reduces muscle tightening and helps the tissues soften without force.
Yoga for Hip Flexors: 7 Poses to Ease Tension
Over time, practicing these poses with steady control teaches your hips to move (and trust) in their full range of motion when you walk, run, climb stairs, or simply stand after sitting at your desk. And because many of these postures also strengthen the glutes and core, the hip flexors don’t have to grip to keep your body stable.
Return to these poses on desk-heavy days, after travel, or post-run, and notice what shifts off the mat: a longer stride, less low-back tugging, and a front-of-hip feeling that’s more responsive, supported, and free.
For more support, use props including blocks, blankets, or even a chair to support your hands. If you feel a pinching sensation at the front of your hips, lessen the intensity of the stretch or skip it—don’t push through the pain. And if you experience persistent hip pain or have had a recent surgery, talk to a physician before practicing.
1. Mountain Pose (At-Home Hip Flexor Check)
This is a quick exercise you can practice to help you notice whether your body is overcompensating for tight hip flexors.
How to:
- Stand tall and bring your attention to the front of your hips.
- If you notice your lower back arching, ribs jutting forward, or your pelvis tipping forward, your body may be compensating for limited hip extension. If the limit feels the same every time, it’s more likely stiffness; if it changes a lot when you slow your breath and steady your pelvis, it may be more of a nervous system response than true tightness.
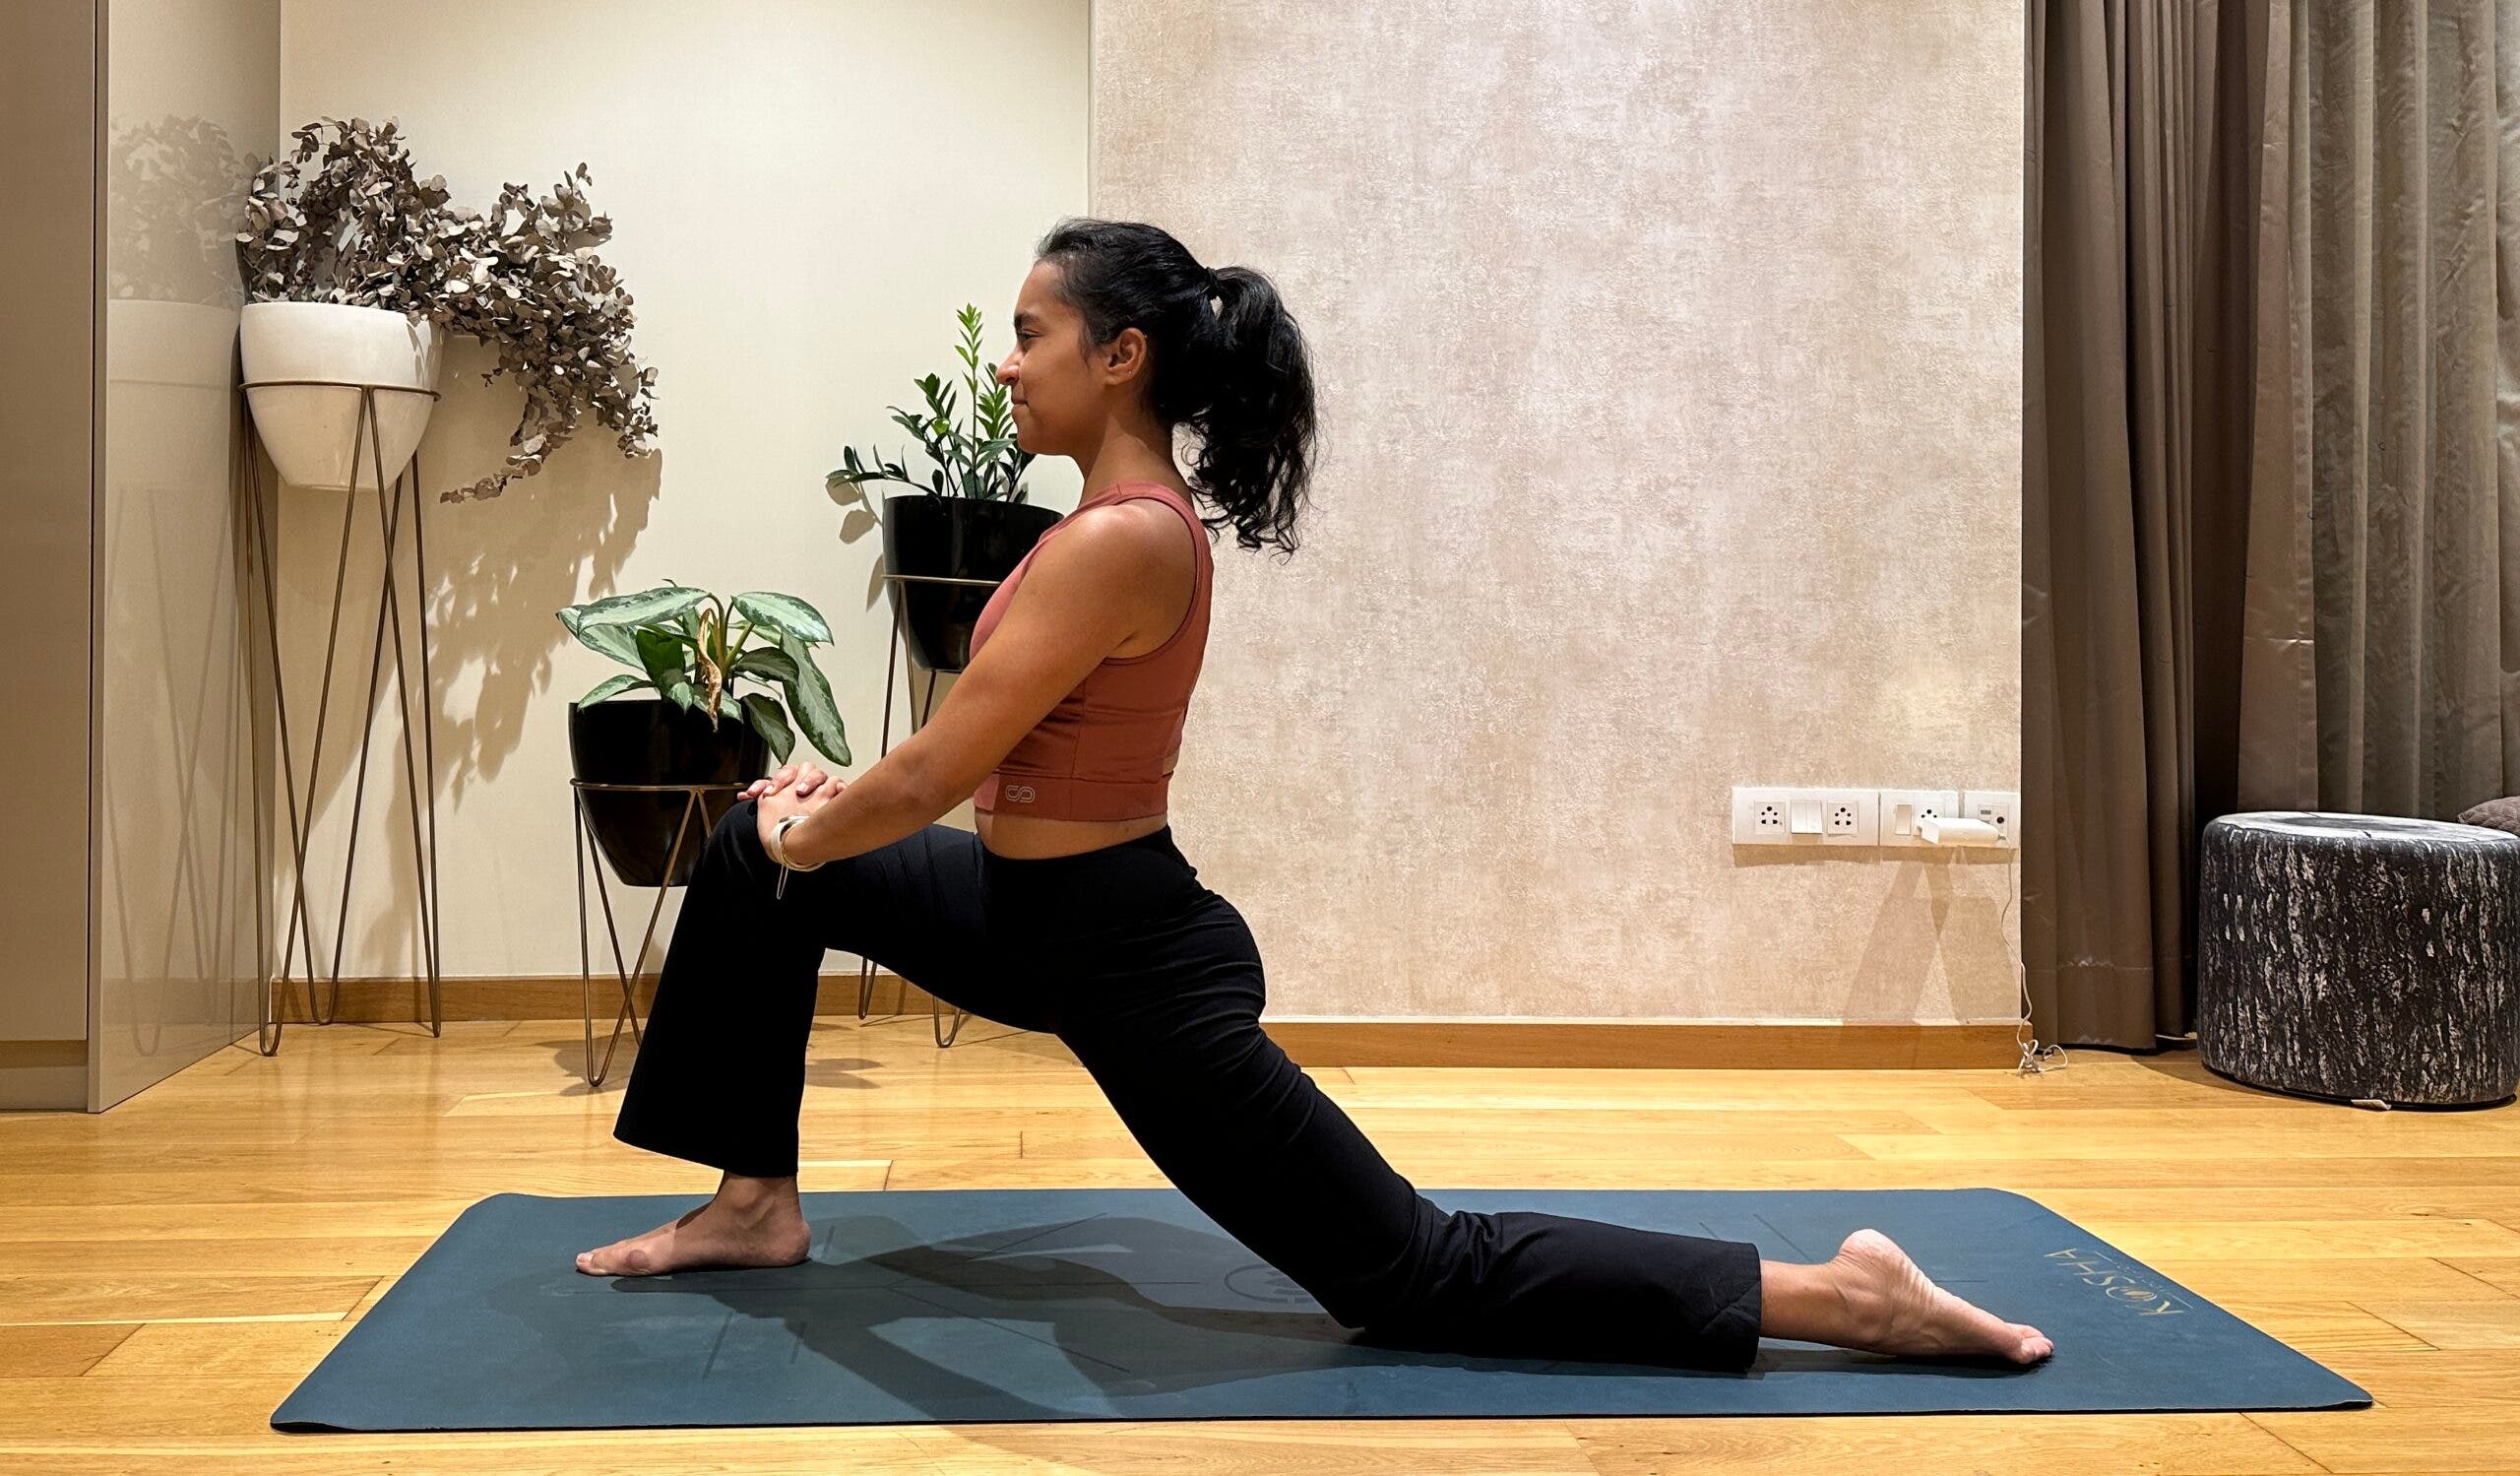
2. Low Lunge (Anjaneyasana)
You’ll feel the stretch along the front of your back leg in Low Lunge. Keep lifting yourself to lengthen the spine and avoid compressing the lumbar region of your back.
How to:
- Come to your hands and knees or Downward-Facing Dog. Step your right foot between your hands. If you haven’t already, lower your left knee to the mat (placing a folded blanket or pad underneath it if needed).
- Inhale to lengthen your spine. Exhale and imagine pointing your tailbone down toward the mat, then shift your hips slightly forward. Stay in Low Lunge for 5-8 breaths, then switch sides.
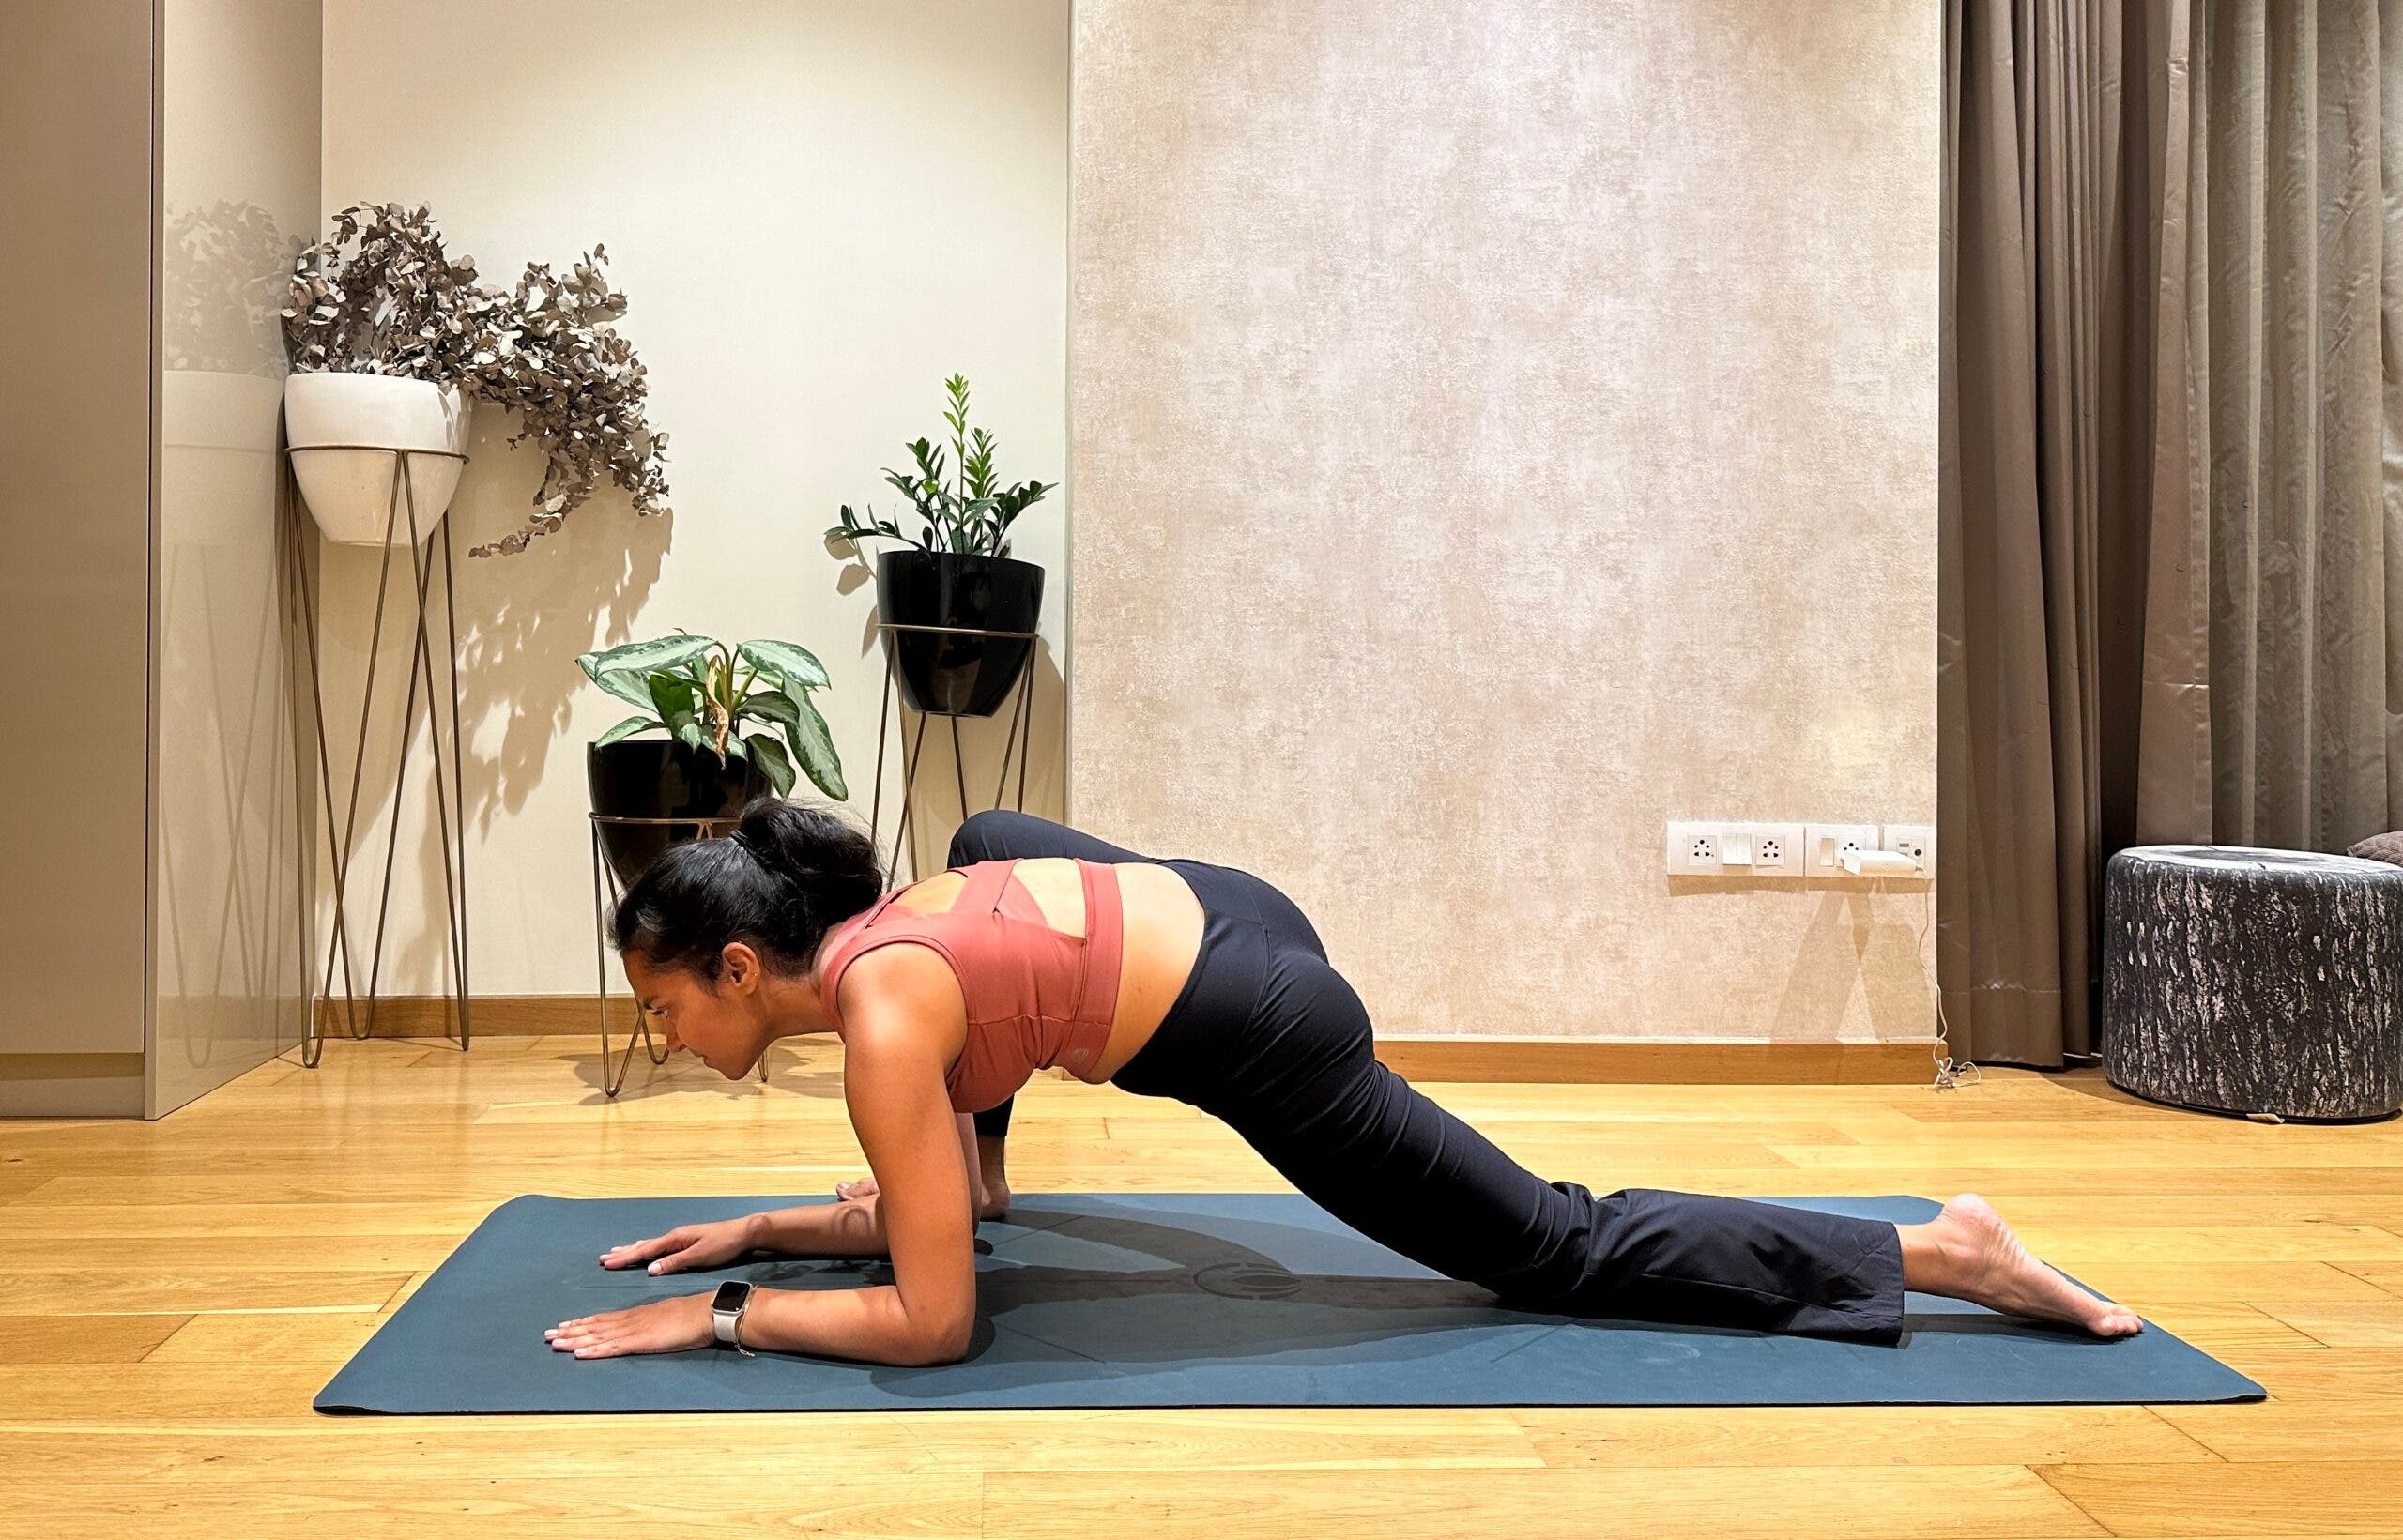
3. Lizard Pose (Utthan Pristhasana)
Great for desk sitting-related stiffness, Lizard Pose stretches the hip flexors in your back leg and the inner thigh of your front leg. It’s especially effective for runners and cyclists.
How to:
- Start in Low Lunge with your right foot forward.
- Lower your hands to the inside of your right foot.
- Keep your back leg straight or lower your back knee to the mat for more support.
- Stay on your hands or lower to your forearms to the mat or blocks. Stay in Lizard Pose for 5-8 breaths, then switch sides.
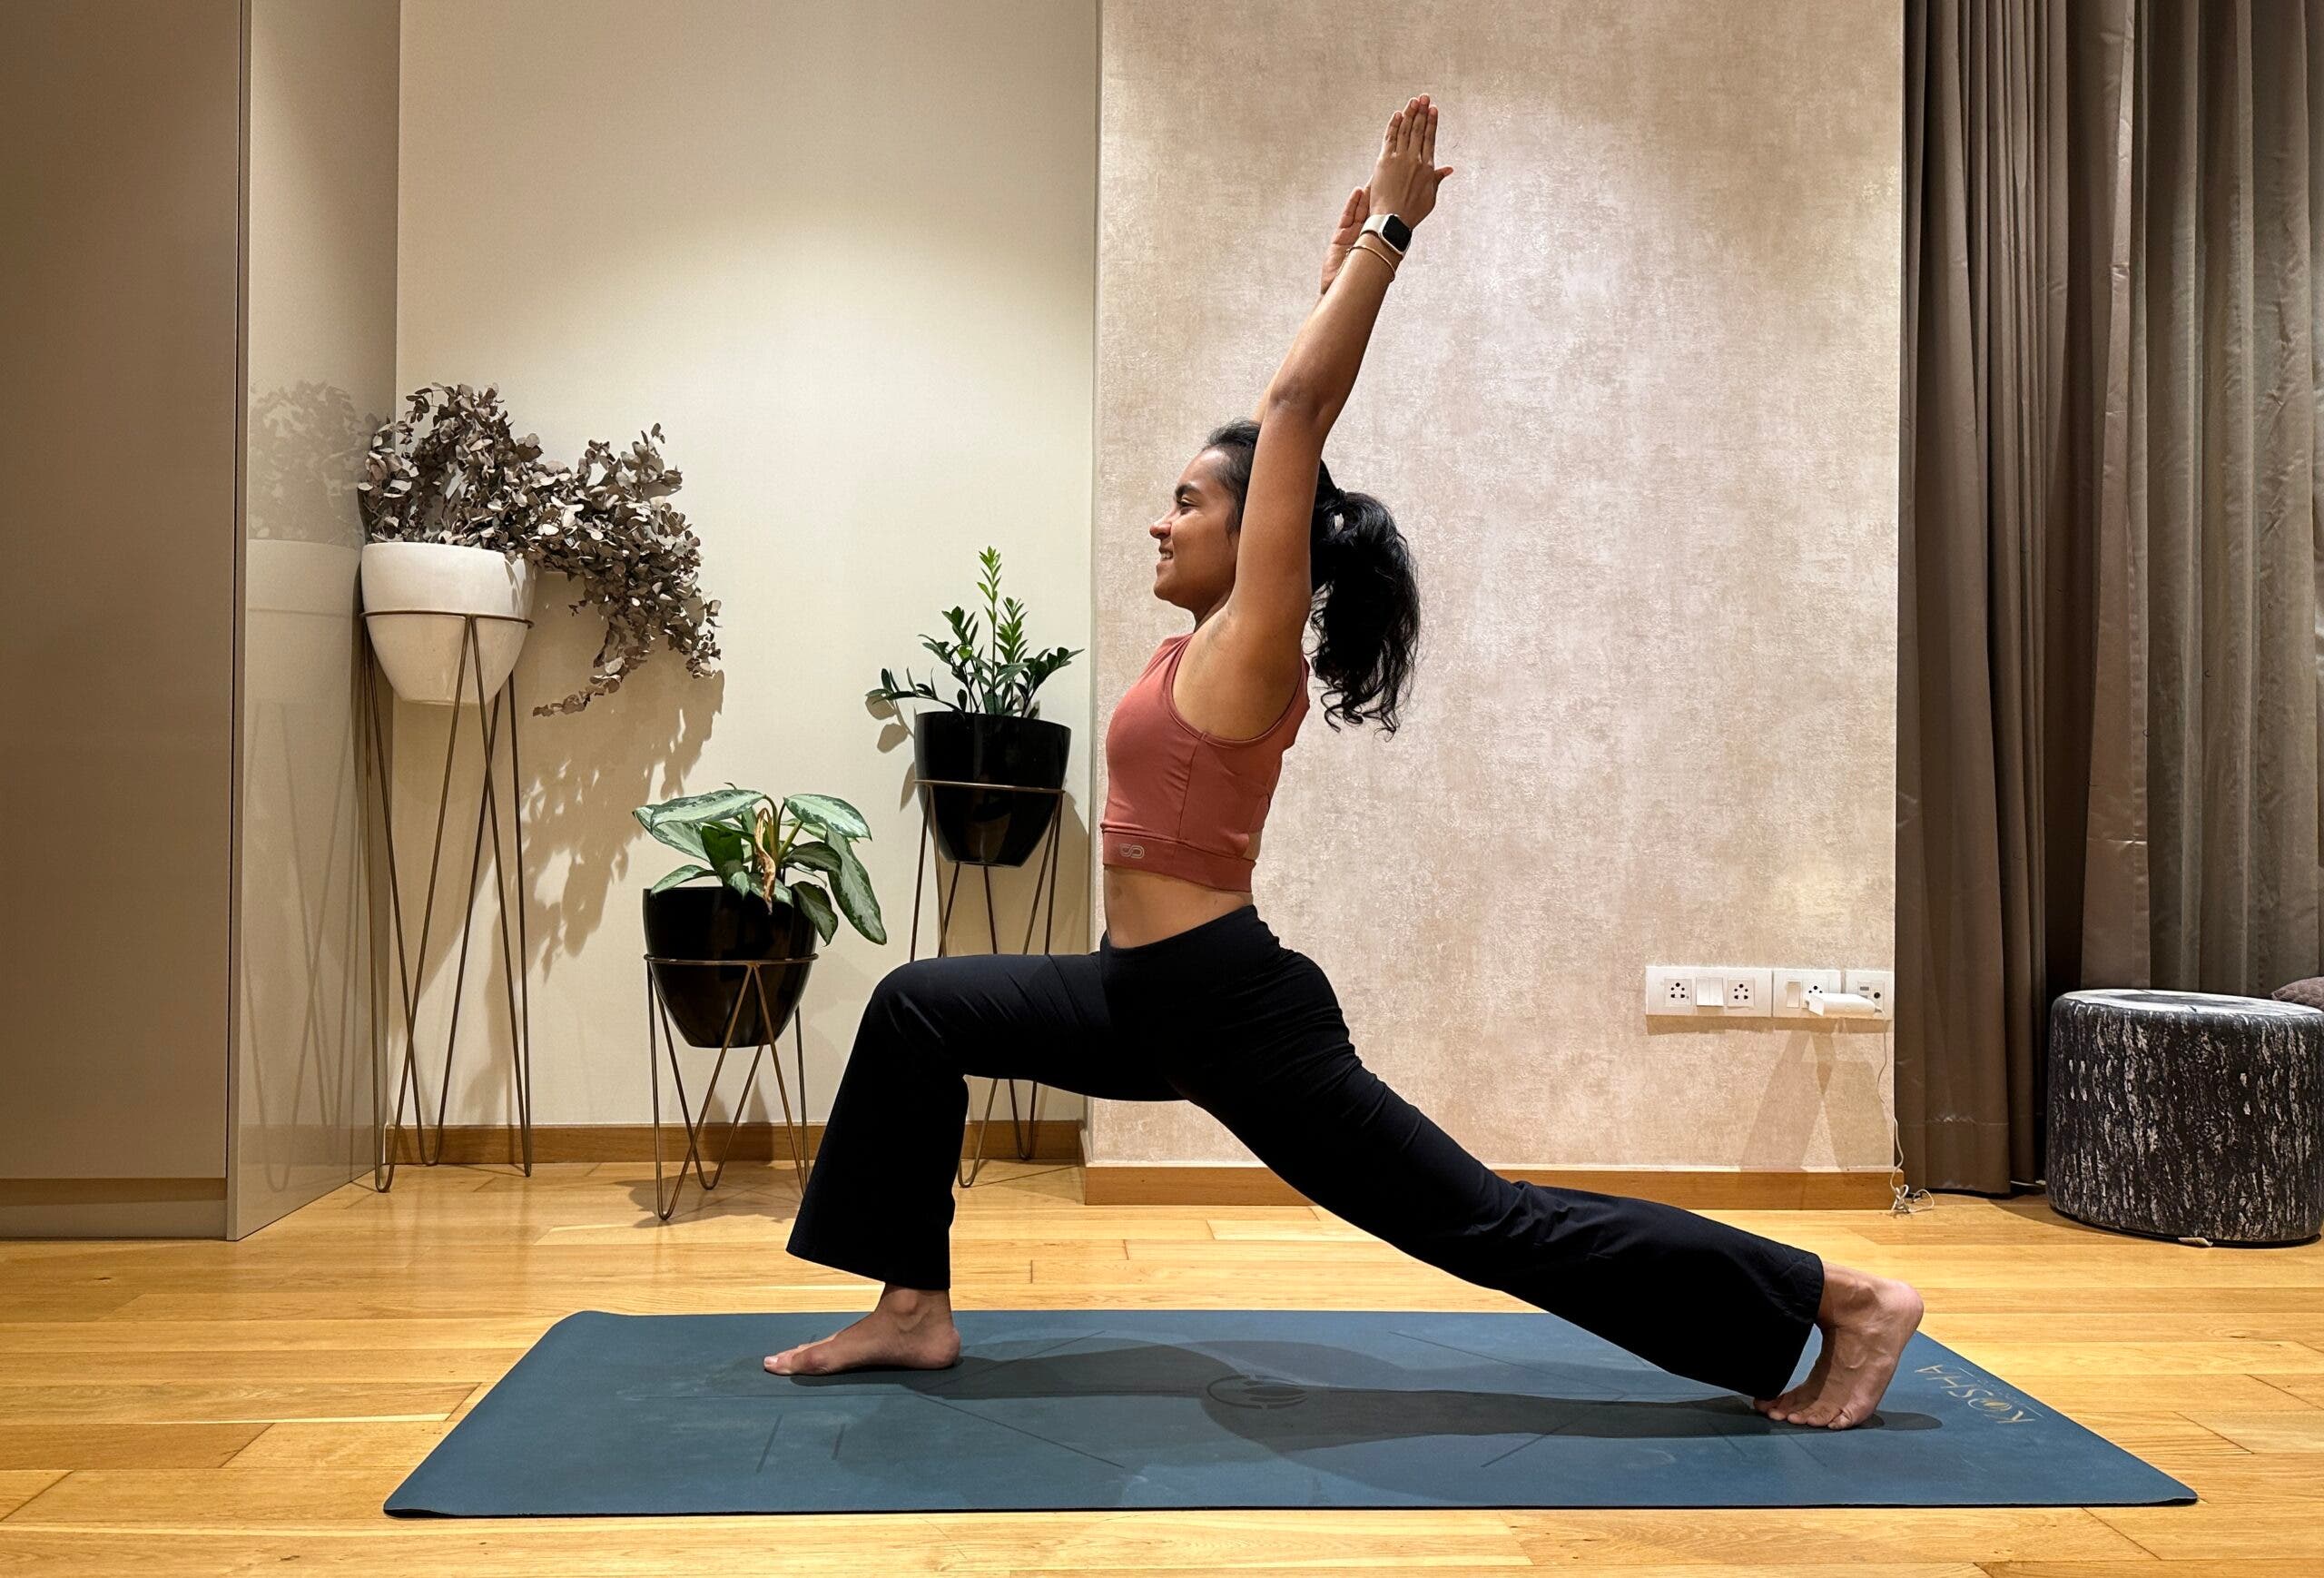
3. High Lunge (Alanasana)
This pose is a strong hip-flexor opener by combining stretching with stabilizing, which trains your hips to lengthen even as your core and glutes contract.
How to:
- From Low Lunge, press the ball of your back foot into the mat and reach your heel toward the wall behind you. Lift your back knee off the mat. You may need to shorten your stance. Reach your arms overhead.
- Exhale and imagine pointing your tailbone toward the mat so your lower back doesn’t over-arch. Stay in High Lunge for 5-8 breaths, then switch sides.
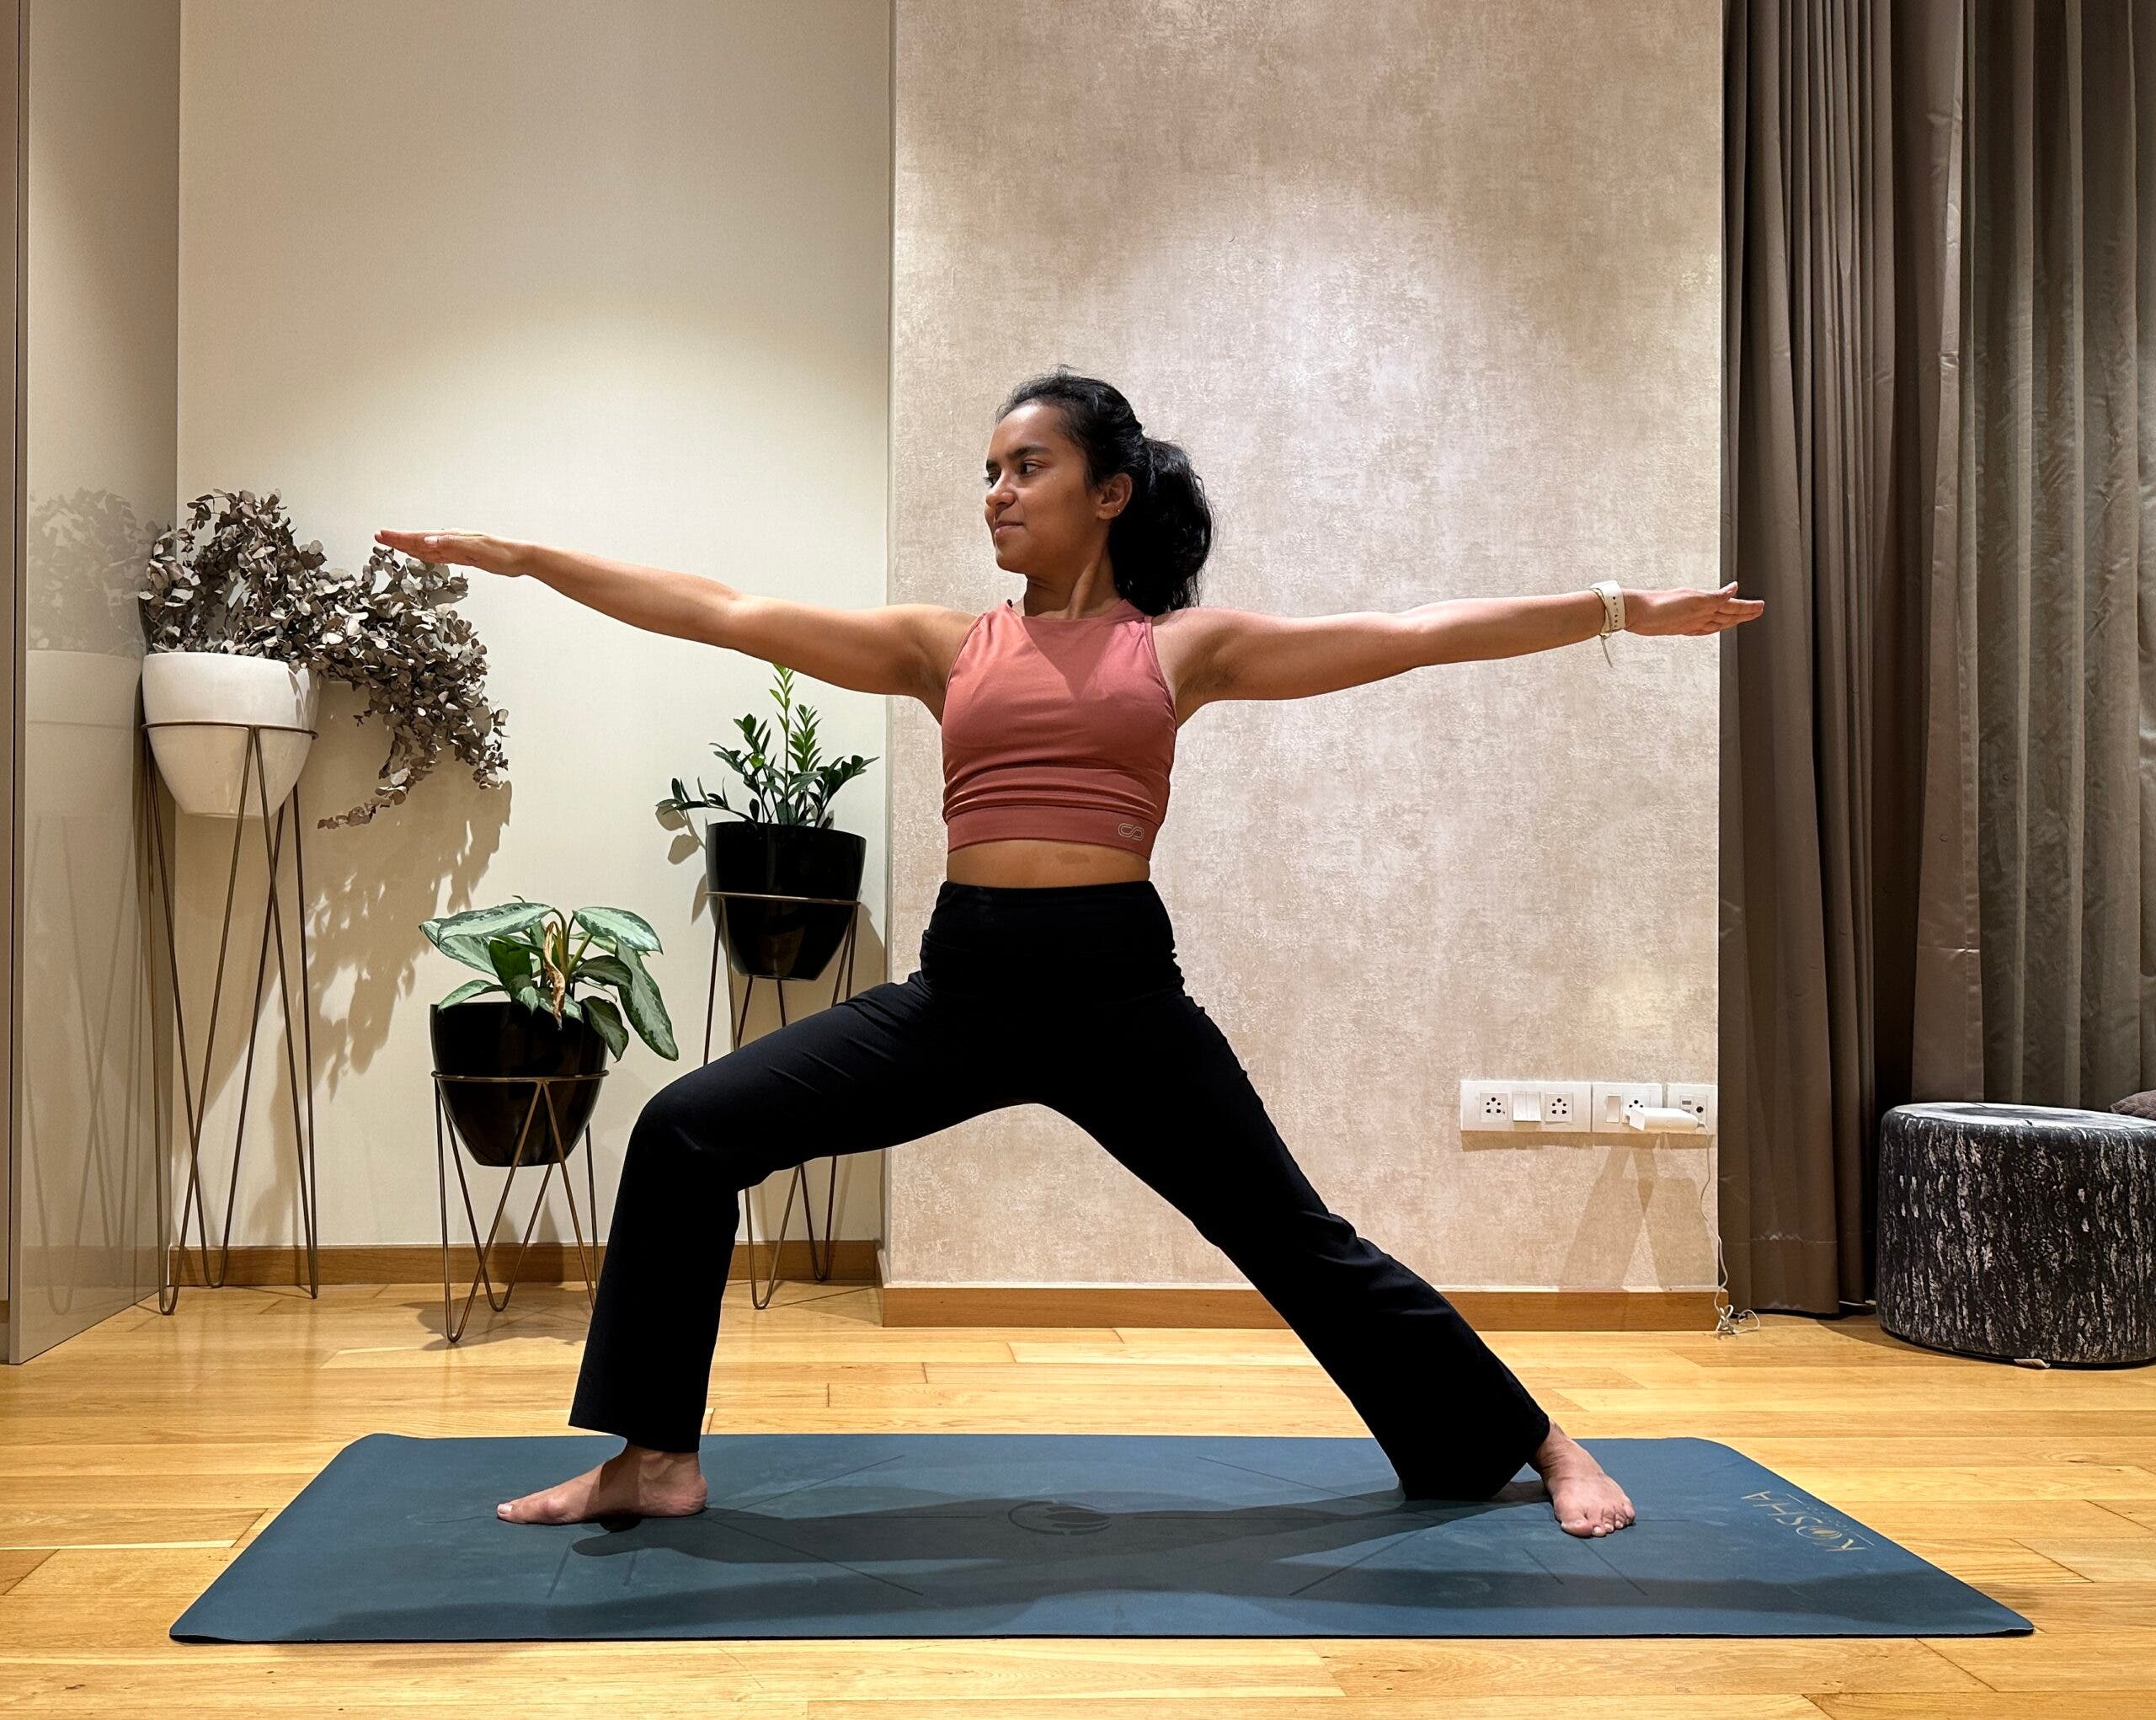
4. Warrior 2 (Virabhadrasana II)
Oftentimes the missing ingredient for hip flexors that feel chronically “on” is hip stability and pelvic control—exactly what Warrior 2 helps build.
How to:
- Stand on the mat with your feet wide. Turn your right toes to face the short edge of the mat and turn your left toes in slightly.
- Bend your right knee to a comfortable position. Make sure your right knee tracks over your right toes.
- Extend your arms at shoulder height and soften your shoulders. Keep your torso stacked over your pelvis; gaze over your front fingertips. Stay in Warrior 2 for 5-8 breaths, then switch sides.
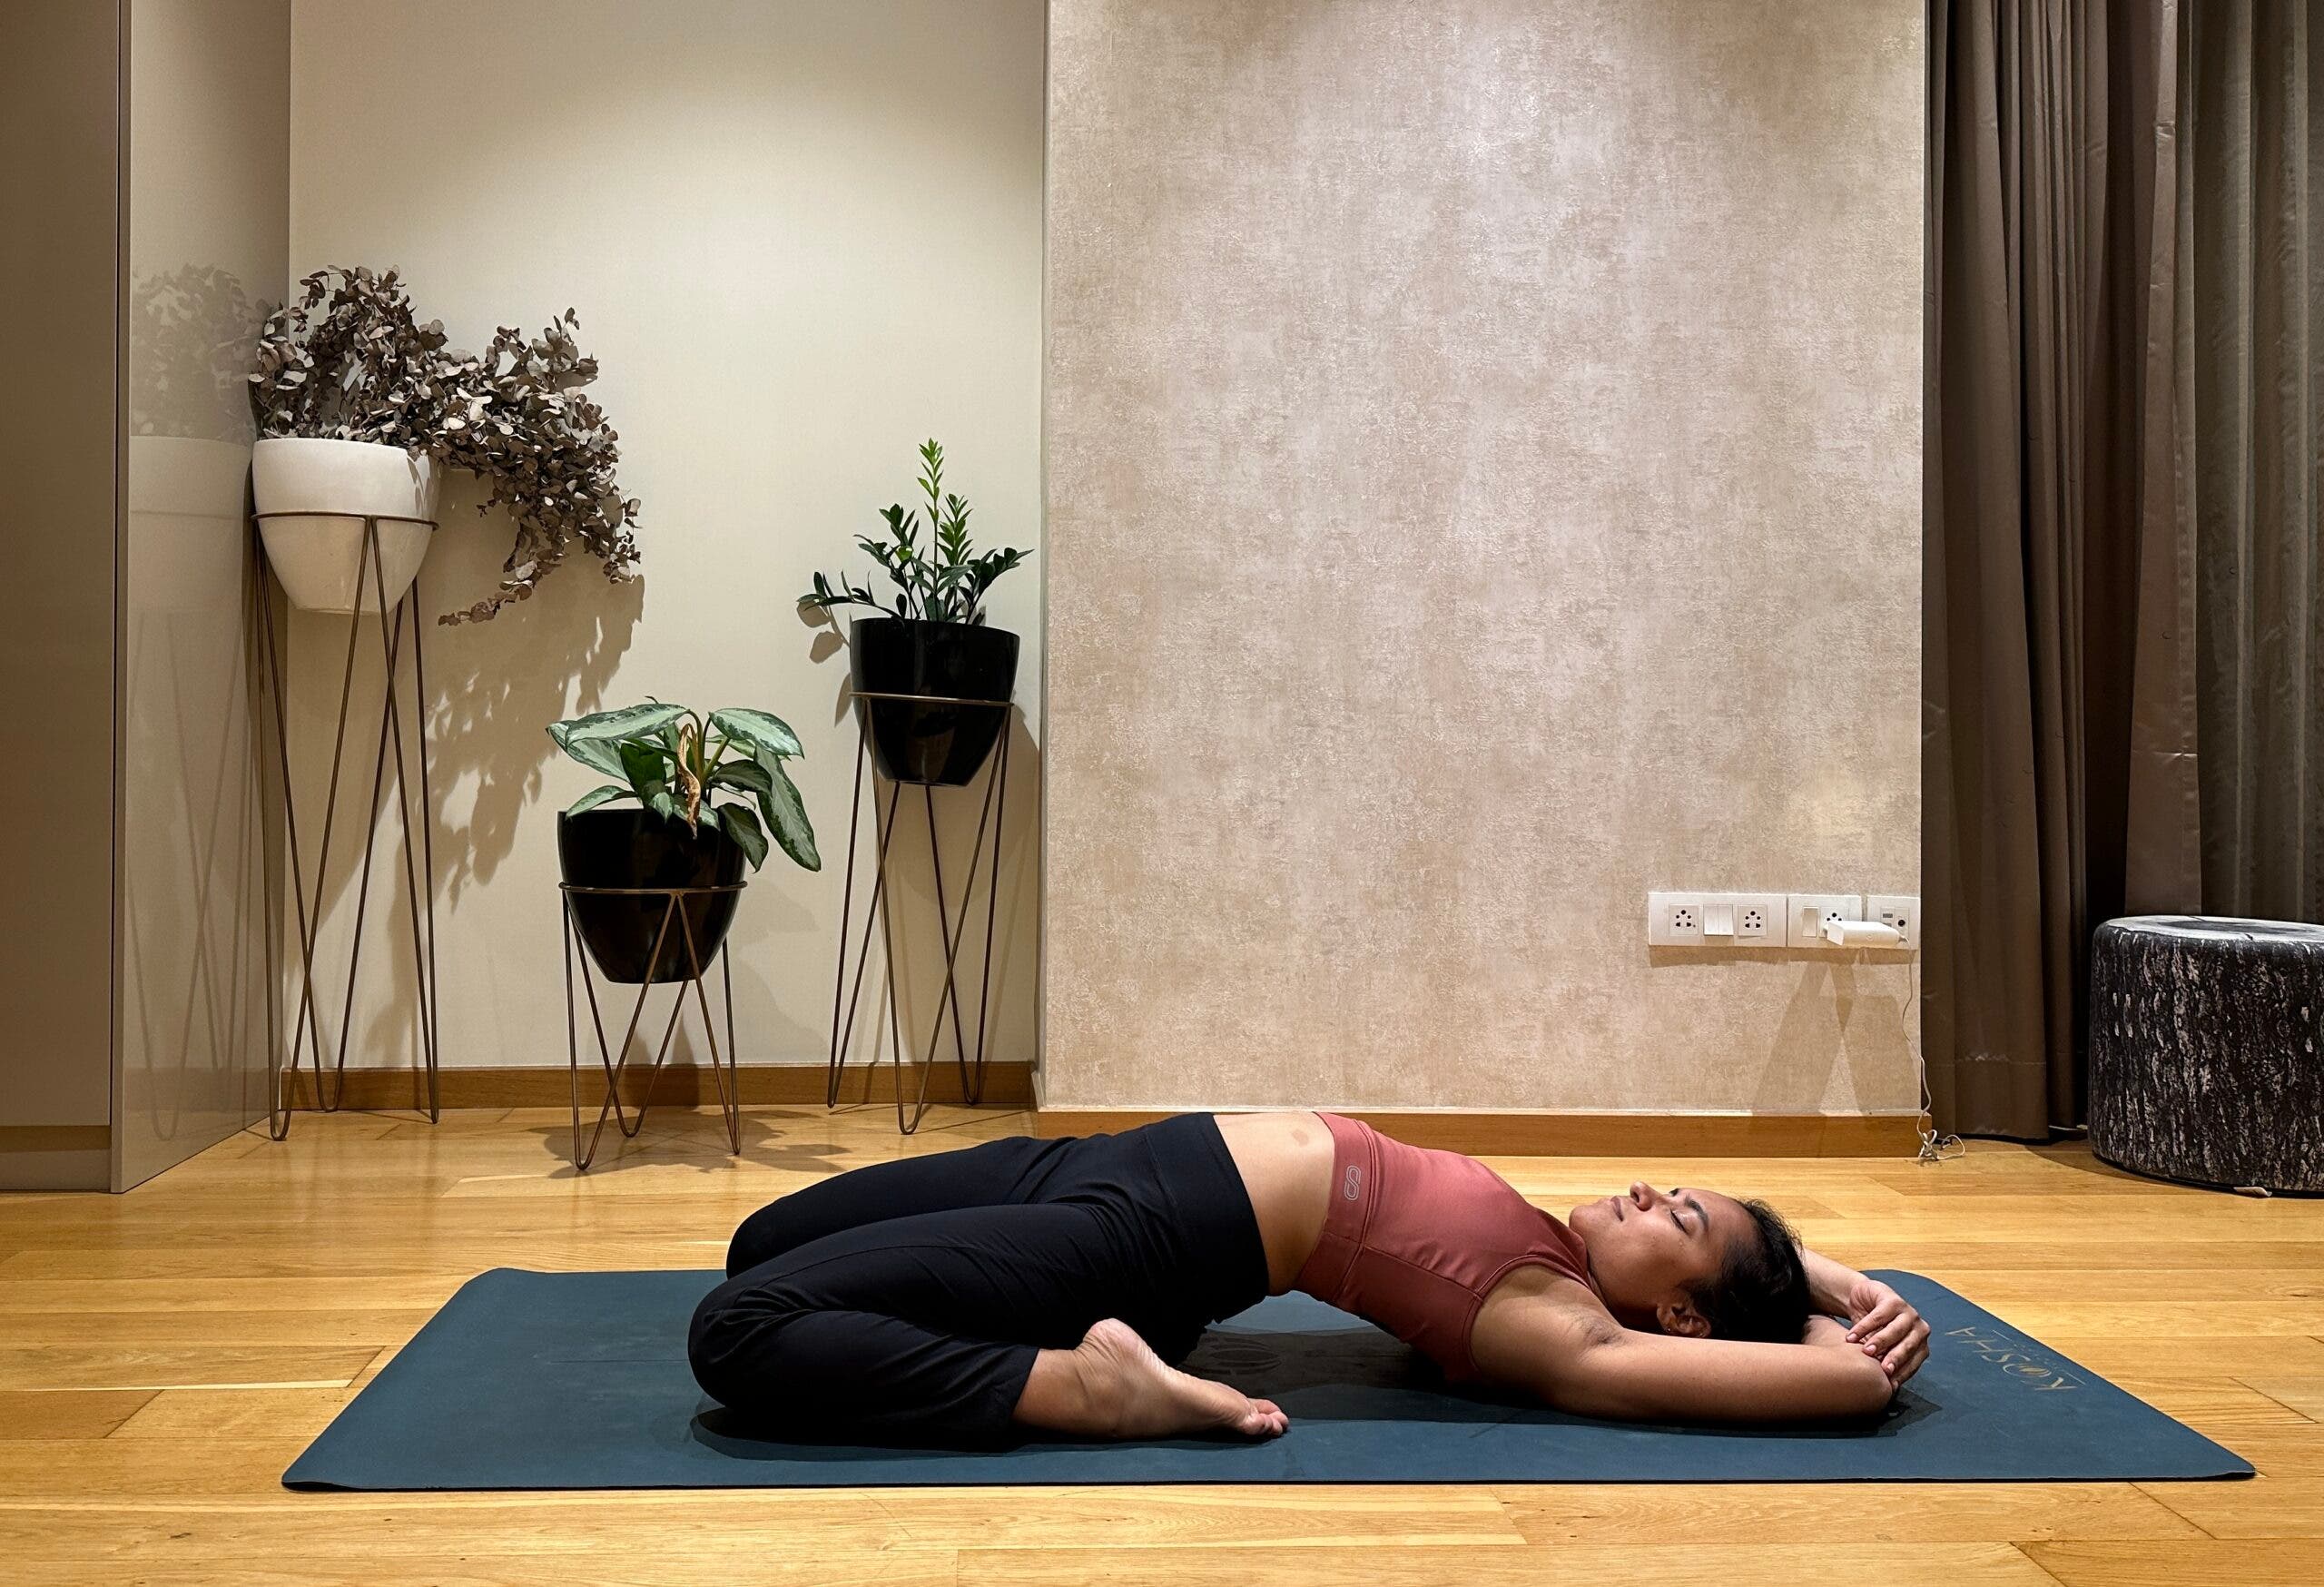
5. Reclined Hero Pose (Supta Virasana)
The rectus femoris, a hip flexor that crosses the knee, can feel especially tight after sitting, cycling, or quad-heavy training. Reclined Hero helps lengthen it along with your quads. If your knees feel uncomfortable, add some support underneath your back or skip the pose.
How to:
- Kneel with your knees together or slightly apart if it’s more comfortable. Sit between your feet (place a block or pillow under your seat if needed).
- Walk your hands behind you and lean back. Stay here or lower onto your forearms.
- Recline onto a bolster or stacked pillows (start higher than you think you’ll need). Stay in Reclined Hero Pose for 5-8 breaths, then slowly rise up.
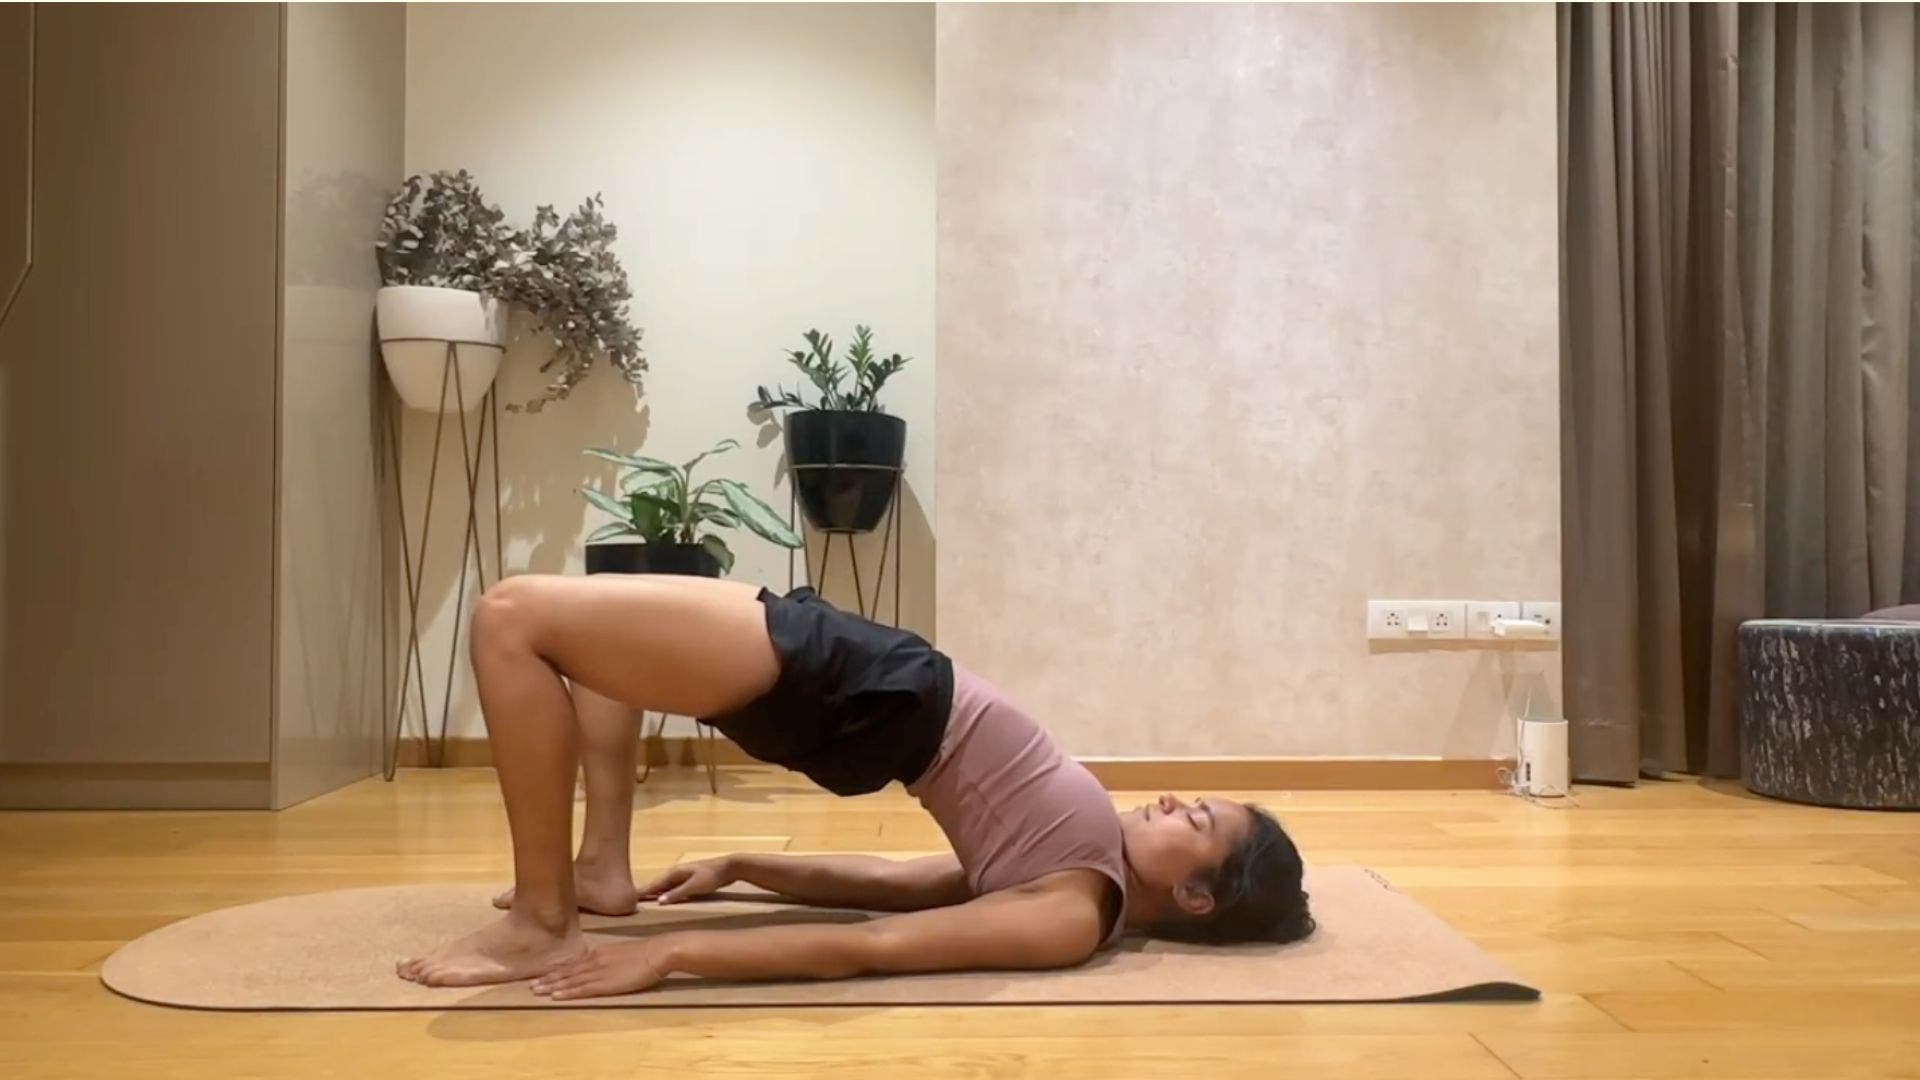
6. Bridge Pose (Setu Bandhasana)
Strengthening your glutes and hamstrings helps ensure the hip flexors don’t overcompensate for them to maintain stability. Bridge Pose helps achieve that while stretching your hip flexors.
How to:
- Lie on your back with your knees bent and your feet on the mat about hip-width apart.
- Inhale as you press your feet into the mat. Exhale as you lift your hips. Keep your thighs parallel to each other. Stay in Bridge Pose for 5-8 breaths, then lower your hips back to the mat.
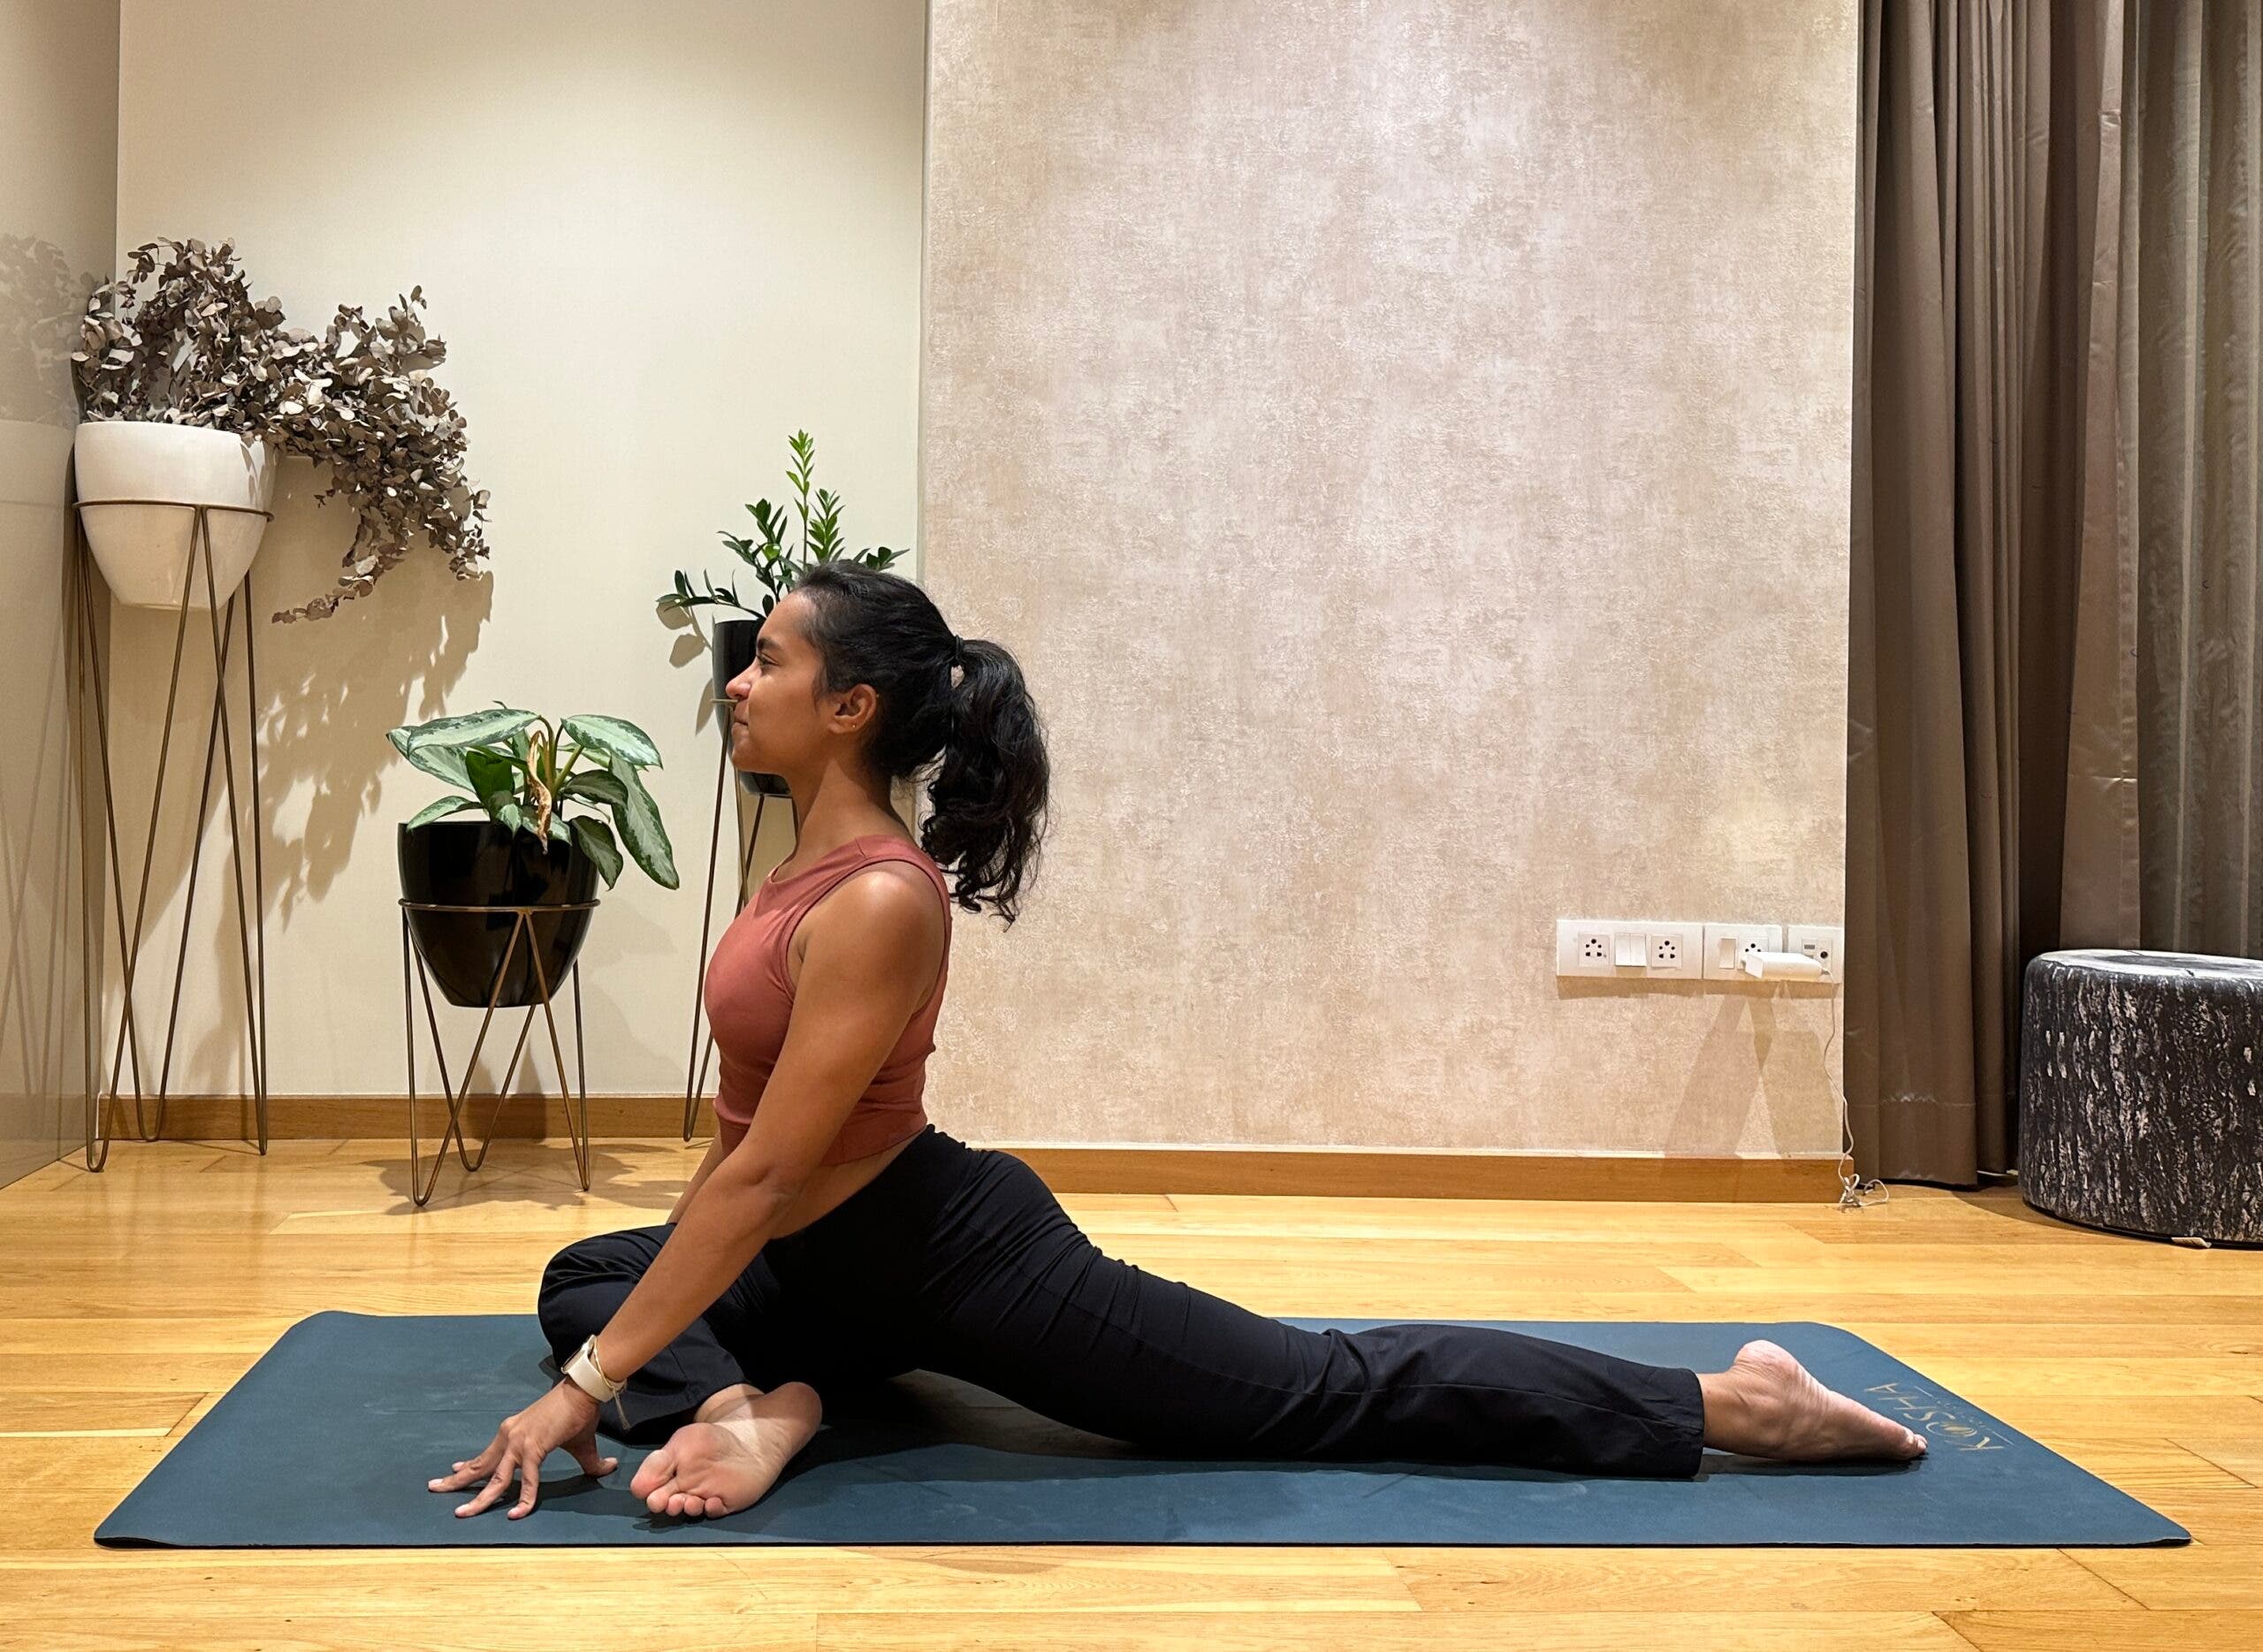
7. Pigeon Pose (Eka Pada Rajakapotasana)
You release hip tension and improve hip rotation in Pigeon Pose—not to mention you offset stiffness from sitting. The pose should feel spacious, never sharp.
How to:
- From your hands and knees, bring your right knee toward your right wrist and slide your left leg straight back. Keep your right foot closer toward your pelvis if your hips feel tight. If your right hip doesn’t touch the mat, place a block or blanket underneath your right hip if it doesn’t touch the mat.
- Stay upright or lean your chest forward over your front leg if there’s no pinching in your front hip. Stay in Pigeon Pose for 5-8 breaths, then switch sides.


